
The Obituaries module in CMS 4media enables you to create, edit, and delete obituaries - a special type of pages that you can later place on your local news website (e.g. on the homepage) using a dedicated widget.
The module has been prepared in the form of a simple creator, where the administrator can fill different fields. The administrator has the ability to create an obituary, schedule its publication date (when it should be published on the website), choose graphics (ribbon, cross, etc.), as well as many other elements.
Obituaries have their dedicated widget that the administrator can add to the website in page builder templates.
Published obituaries can be viewed by users on a dedicated subpage: e.g. https://demo.4media.com/obituaries.
How to add a new obituary in CMS 4media?
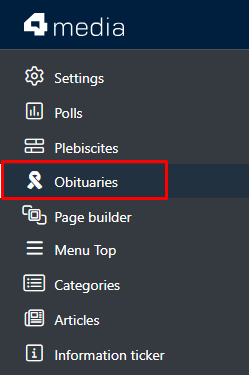
After logging into the admin panel, select the "Obituaries" module from the menu on the left side.
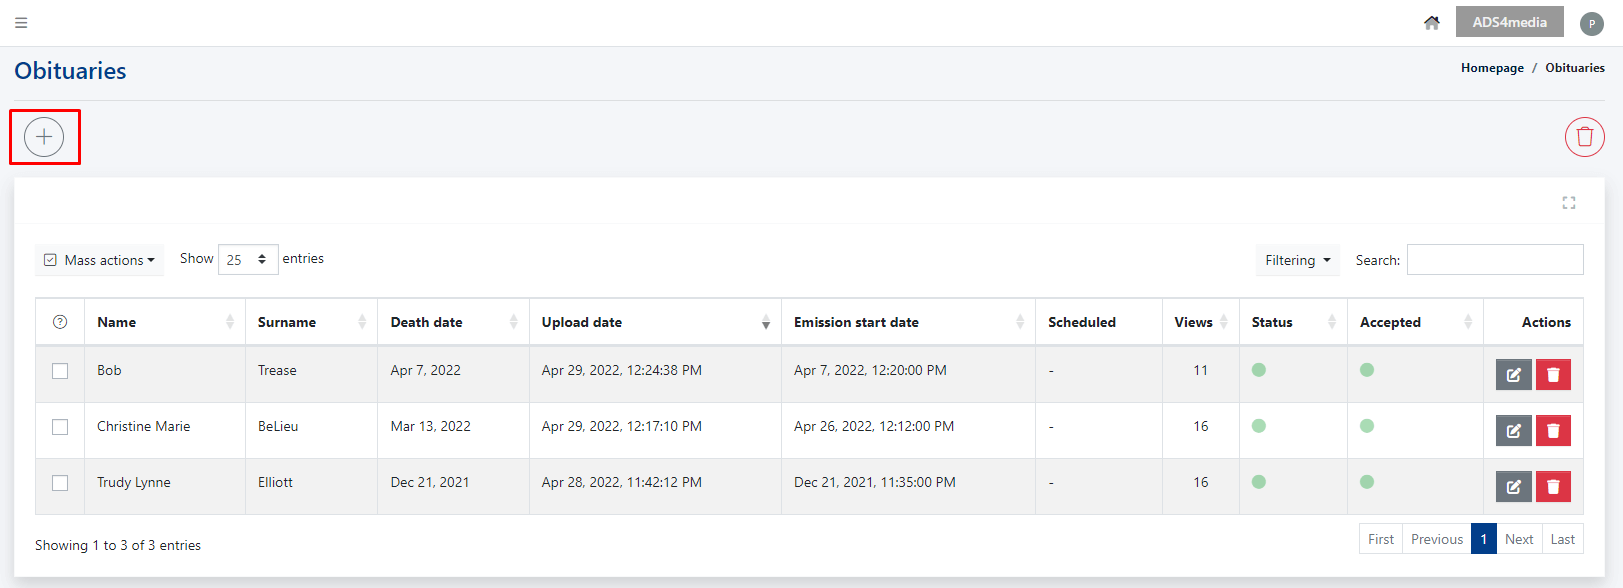
Next, at the top above the list of published obituaries (the list will be empty if none were added previously), click on the plus icon.
The obituary creator will appear, where you can write the most important information about the deceased person and the upcoming funeral ceremony.
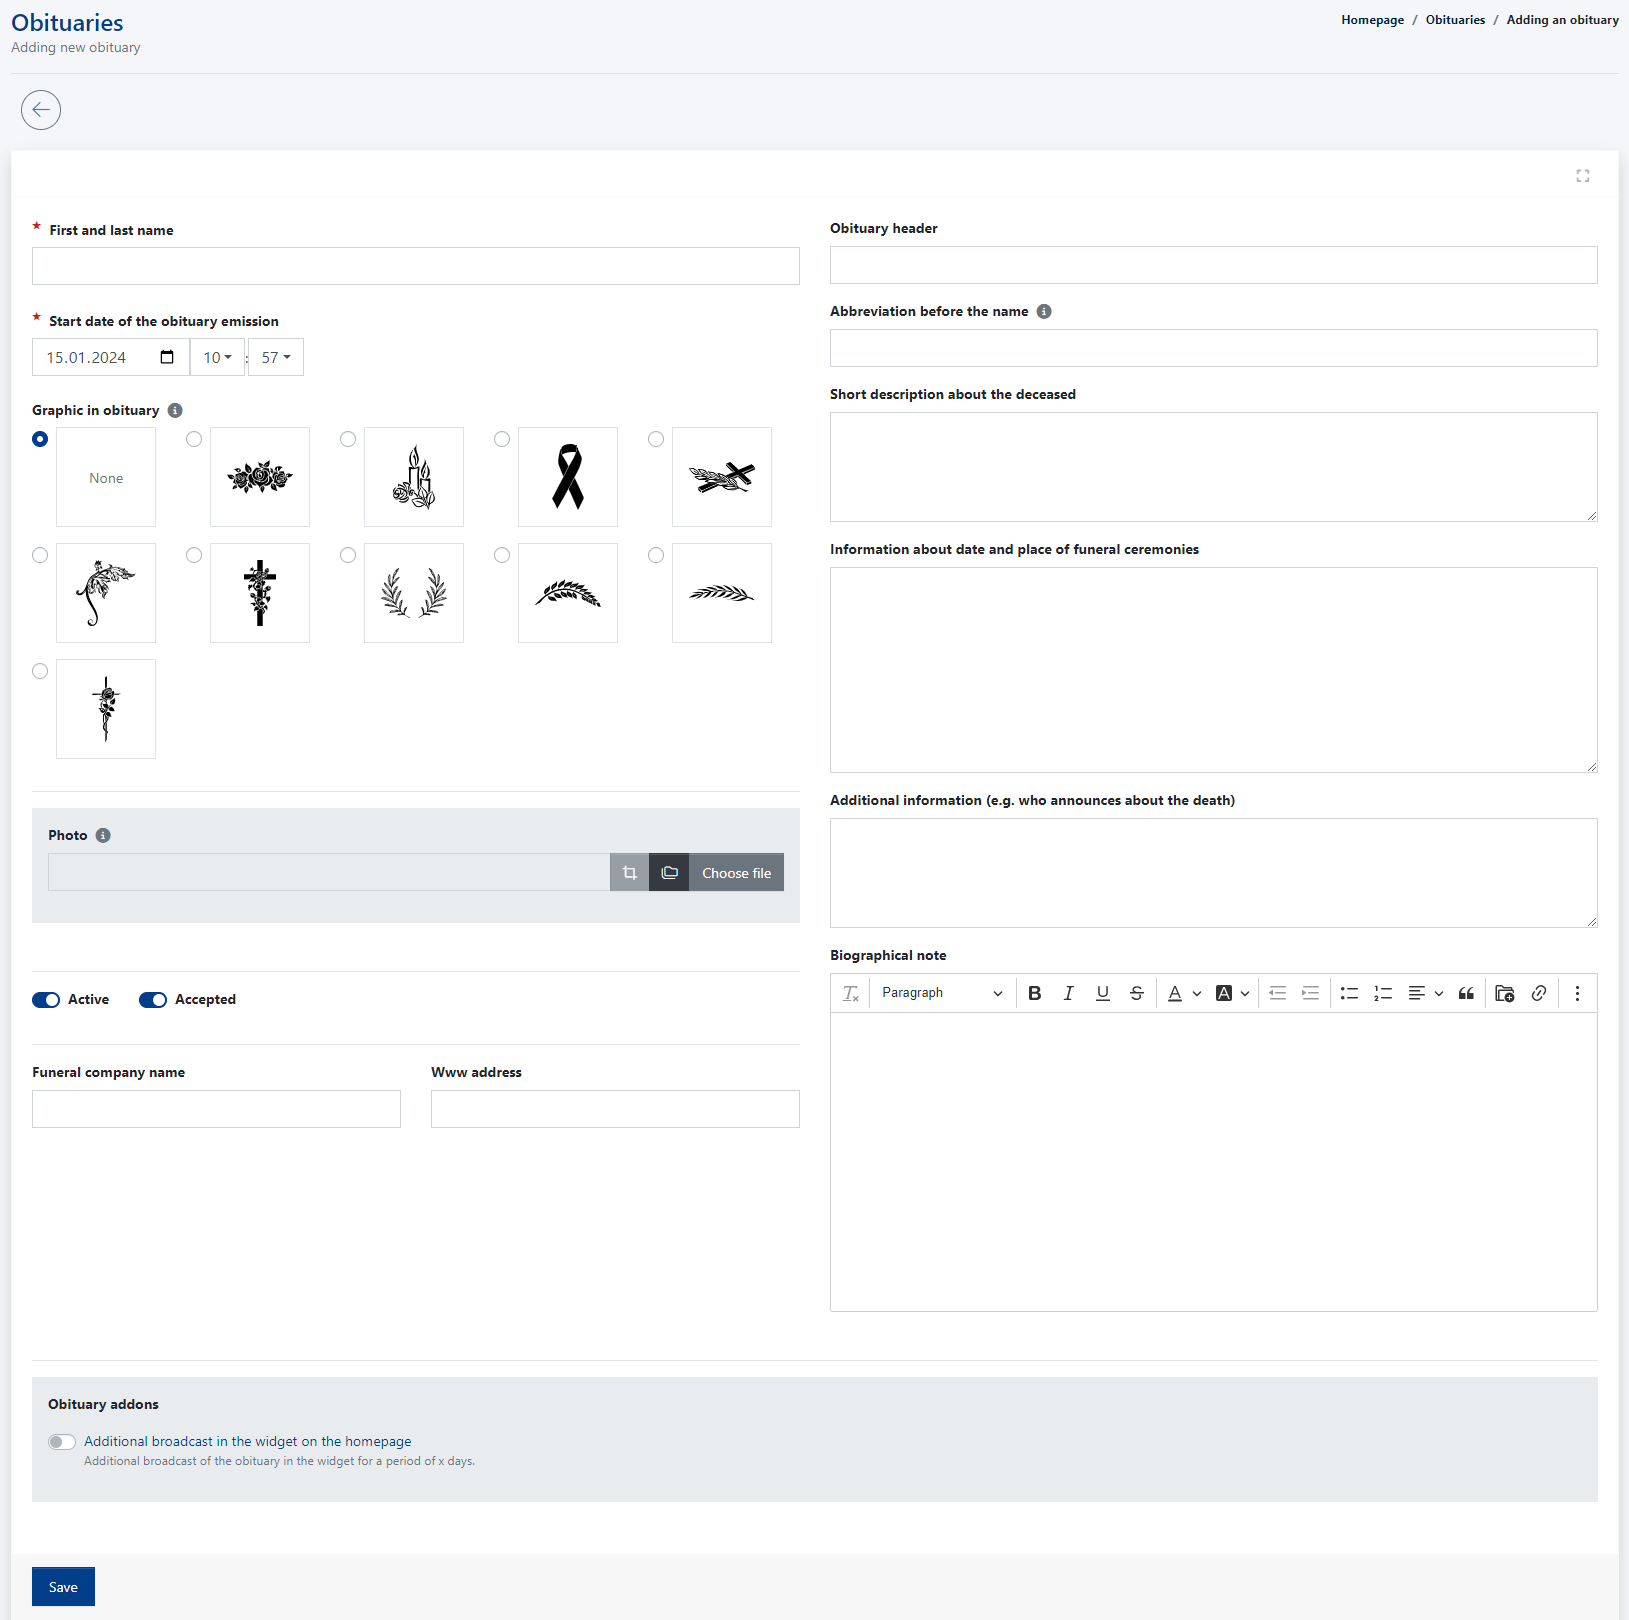
To confirm all the entered information, click the "Save" button at the bottom of the page. The saved obituary will then appear on the obituaries list.
You can navigate back to the list of obituaries by clicking the arrow at the top of the page labeled "Back to List," or by clicking "Obituaries" in the main menu on the left-hand side.
From the obituaries list, the administrator can manage the obituaries by editing, deleting, activating, or deactivating them (removing them from publication on the website).
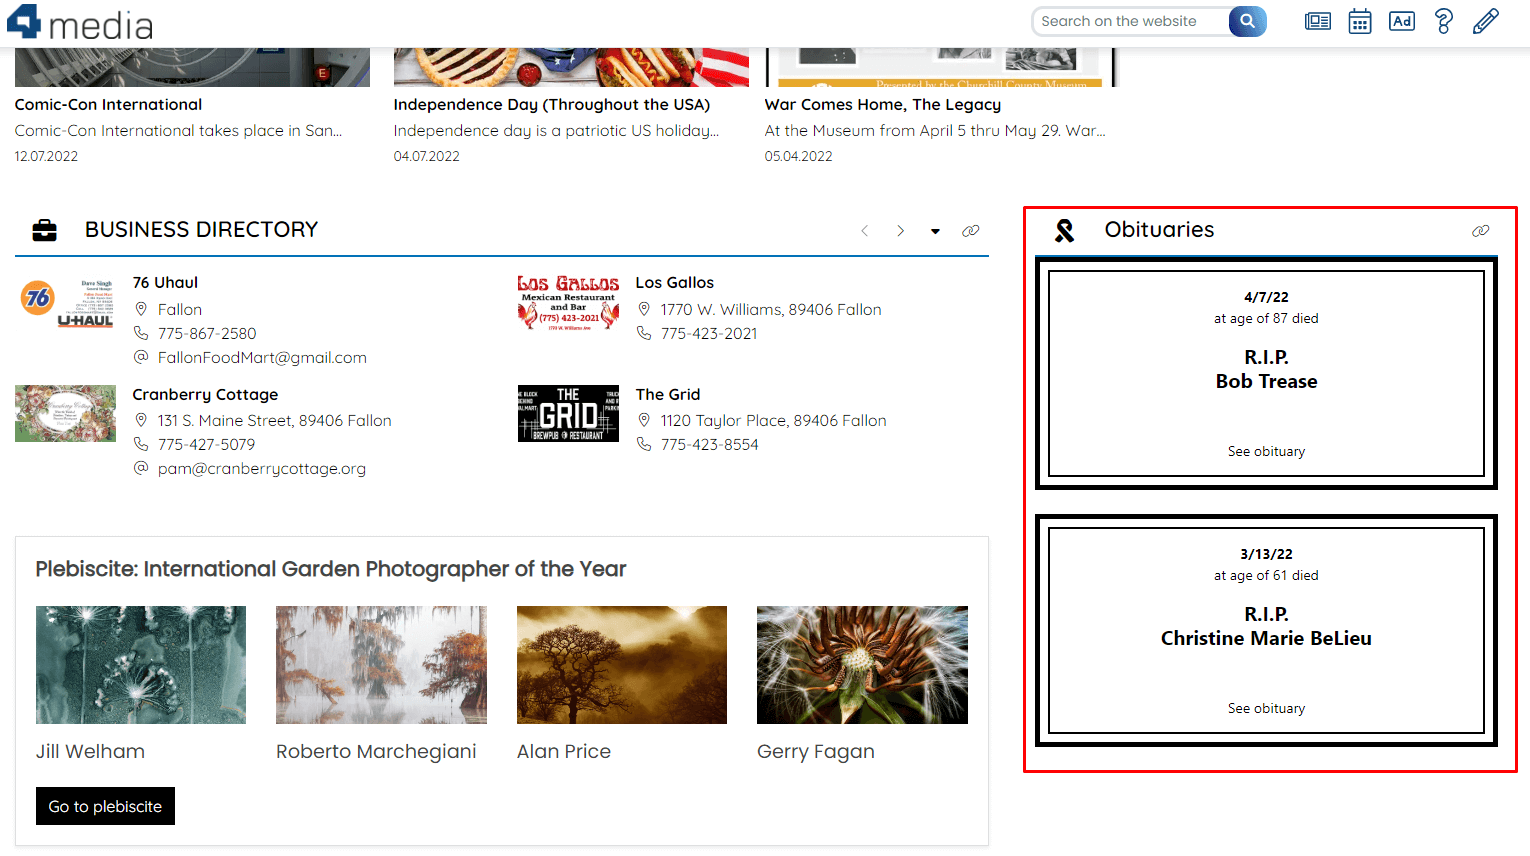
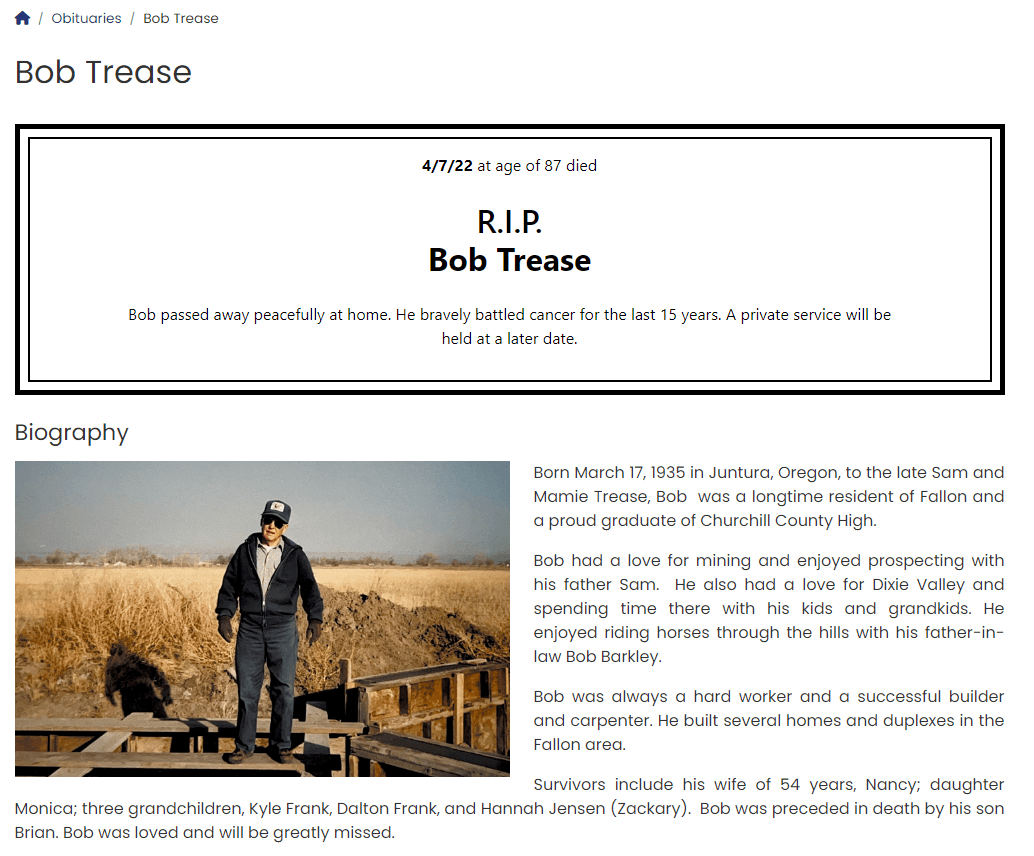
Here is an example of a published obituary page on the website:
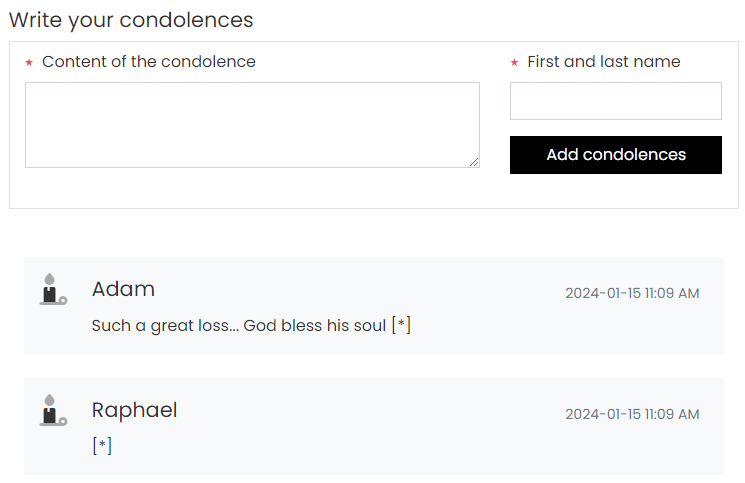
Under each obituary, portal users can post condolences. This is a separate type of comments for which we have created a completely distinct module in CMS 4media. As the administrator of your portal, you can enable the addition of condolences in the general portal settings.
Learn more: Condolences Module.
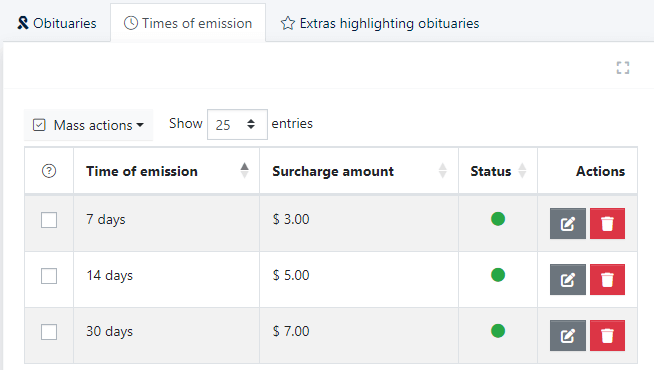
Times of emission
In January 2024, we introduced a new tab to the Obituaries module - Times of emission. These operate similarly to the emission times available for Classifieds or company entries in the Business Directory module. Publishers independently determine the broadcast times for obituaries on their websites, specifying whether the broadcast time will be free or paid.
To create a new time of emission, click on the round plus button located in the upper left corner of the tab.
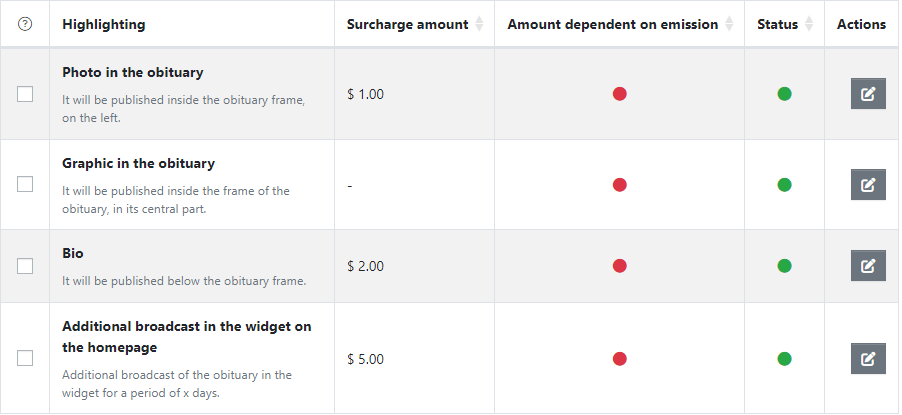
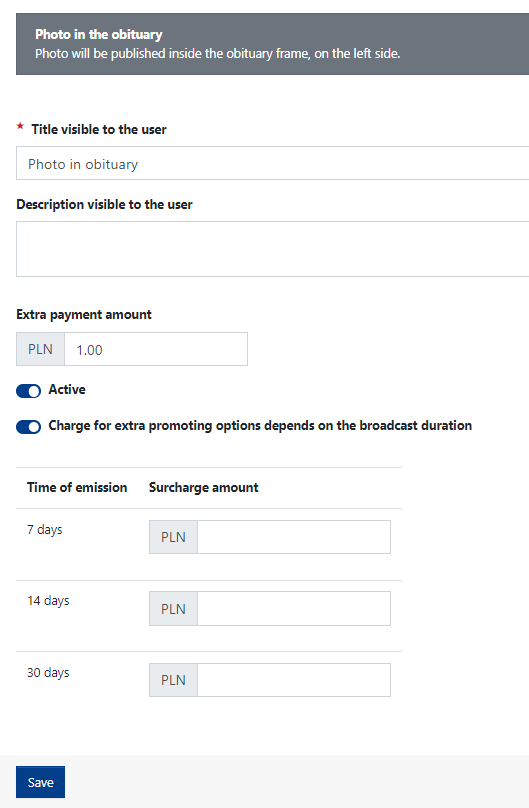
Extras Highlighting Obituaries
Thanks to Extras Highlighting Obituaries, users ordering the publication of an obituary can enhance its appearance. Available paid (or free) add-ons in the obituary submission form include:
- Deceased person's photo (published inside the obituary frame)
- Graphic (as an alternative to a photo)
- Biographical note
- Additional broadcast of the obituary in the widget
Publishers decide whether these add-ons should be available in the obituary order form, which will be accessible to website readers.
To activate and personalize an Highlight, go to the editing mode of the specific add-on.
In editing mode, we specify:
- Title and description visible to the user
- Additional fee amount (which may vary if its dependency on the chosen broadcast time is activated by the user).
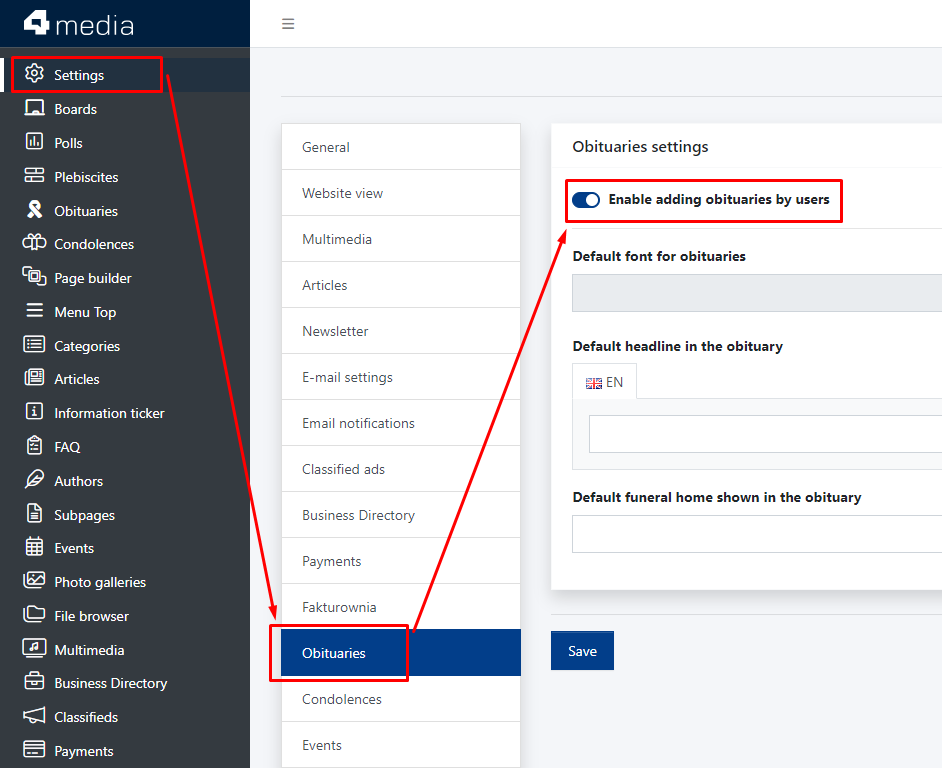
Adding an obituary by website user
The form allows readers to place orders for obituary broadcasts online. The obituary will be published on the portal upon successful completion of the form and payment.
To activate the form on your portal, go to the Settings module -> Obituaries and then activate the [Enable user obituary submissions] function.
The appearance of the obituary broadcast order form on the website has been integrated with payment gateways (similar to the Classifieds and Business Directory modules). If the website has at least one active payment gateway, paid broadcast times and extras can be activated and made available in the form. Otherwise, obituaries will be commissioned for free through the form.
Individuals ordering obituaries through the website's form will receive email notifications confirming the acceptance of their online obituary emission order.
Email notifications will not be sent if a (correct) email address for message delivery has not been configured on the website (Settings module -> Email settings).
.png)
How to embed the obituaries widget on the website?
Learn about this from the dedicated guide: Obituaries Widget.