
The Classifieds module in CMS 4media enables website users to publish classifieds in various categories, such as small ads like selling, buying, trading, etc., which are displayed on the website for a specified duration.
Classifieds published by users are accessible on a dedicated subpage, e.g.: https://demo.4media.com/classifieds.
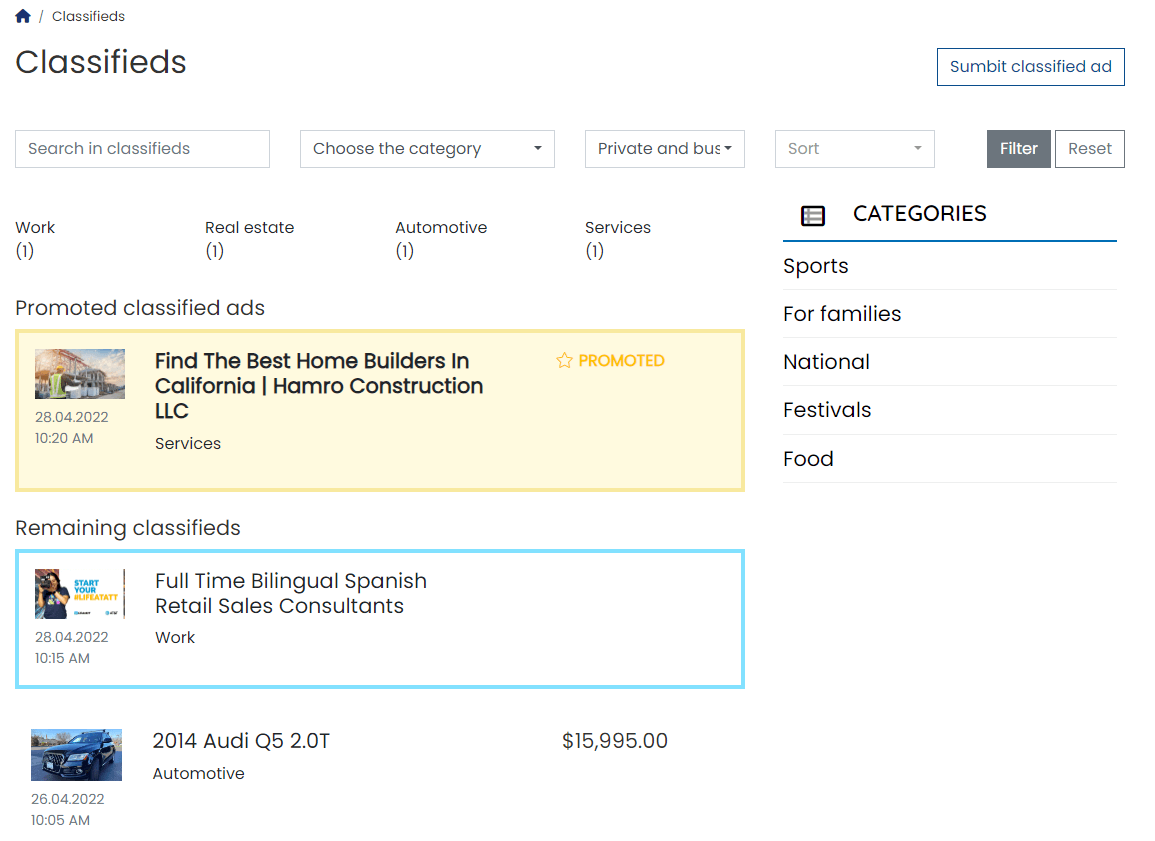
Classifieds can be added by both: logged-in or non-logged-in users. In the former case, a registered and logged-in user gains greater control over their entries - they can manage them in the "My Classifieds" section, meaning they can edit their content or delete them.
As the Publisher (owner of the website powered by our CMS 4media), you can decide whether adding classifieds should be free or paid, for example, only for specific categories. You can also completely disable the ability to add classifieds on your website.
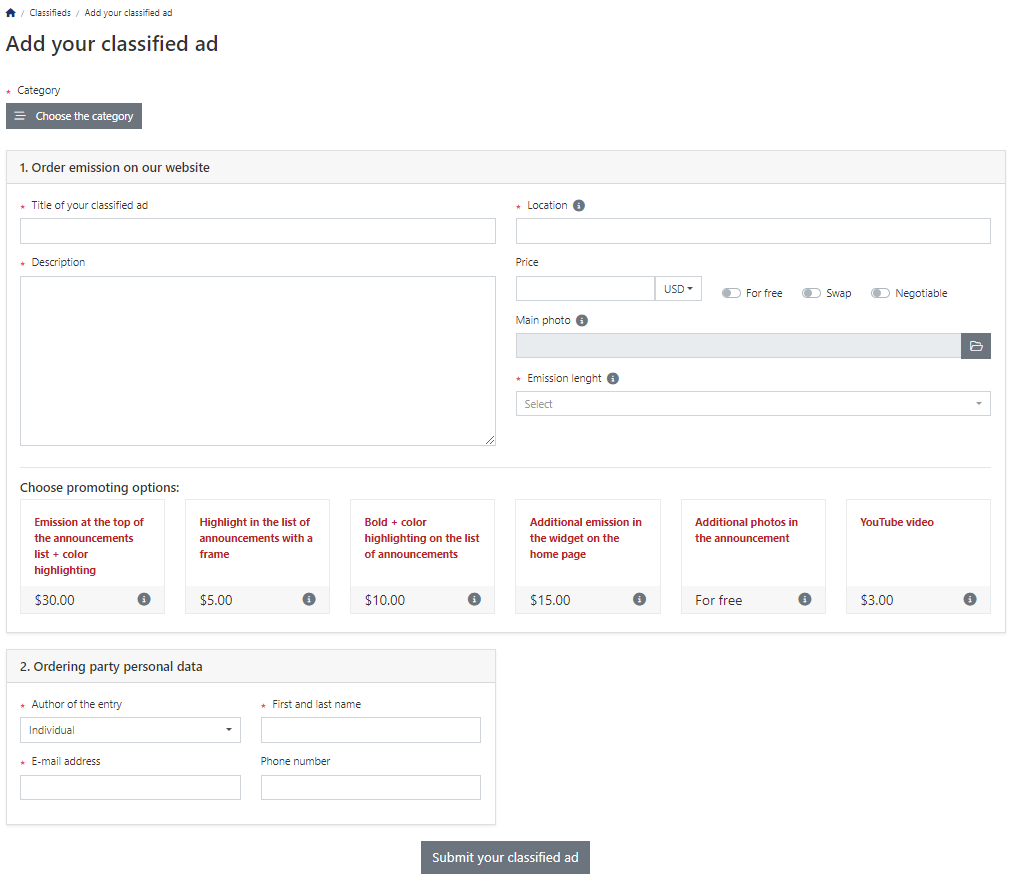
Each one classified can have a main photo as well as additional ones, a description, and even tags. Users interested in making a purchase or using a service can contact the advertiser using a contact form displayed in the classified or by clicking the "Call" button - this will display the advertiser's phone number (if provided during the classified creation).
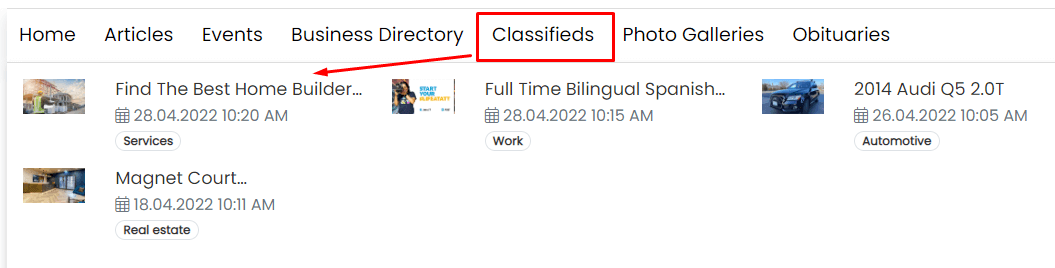
You can also add a shortcut to the classifieds in the category menu. Upon hovering over it, a mega menu will appear displaying the latest entries.
You can also display classifieds in the dedicated widget on the homepage or add them to another template within the Page builder module. You can find more about this topic in the guide: Classifieds Widget.
Managing classifieds
All user-added classifieds are listed on the Classifieds List (in Classifieds module). As an administrator in CMS 4media, you have full control over them, including the ability to:
- Filter,
- Search by specific keywords,
- Export the entire classifieds list to a CSV or PDF file,
- Edit,
- Delete,
- View payment details.
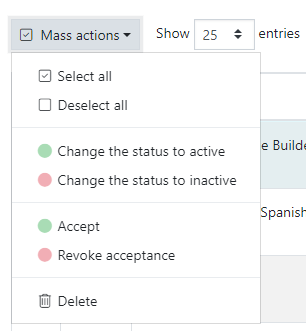
There are also bulk actions available for multiple classifieds at once:
- Change status to active,
- Change status to inactive,
- Accept,
- Revoke acceptance,
- Delete.
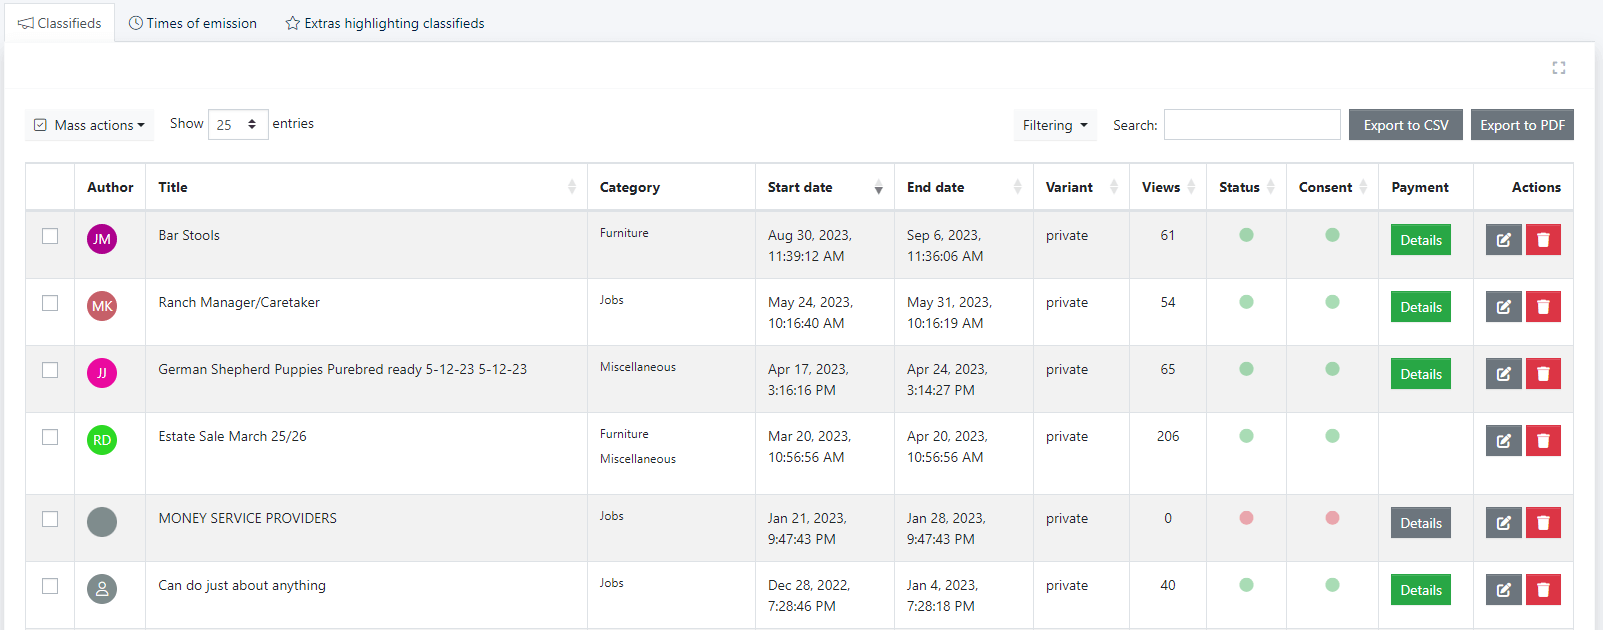
On the classifieds list in the admin panel, you will see data such as:
- Classified author,
- Classified title,
- Category to which the classified is assigned,
- Start and end date of broadcasting,
- Variant - private or company,
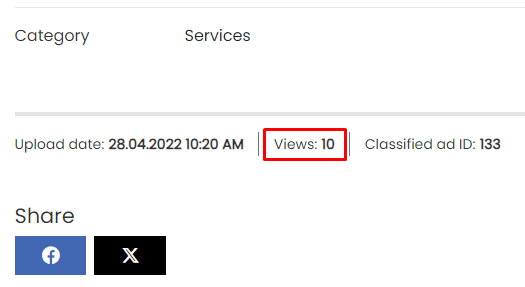
- Number of impressions (views) of the classifieds,
- Status - marked with a green dot (active) or red dot (inactive),
- Consent - marked with a green dot (approved) or red dot (not approved),
- Payment - if the user made a payment, for example, for highlighting the classifieds, a green "Details" button will appear. Clicking on it allows you to view detailed transaction information.
Times of emission
In this section, you can add, delete, or edit the available classifieds broadcast times for users (Times of emission). You can decide whether all of them should be additionally paid or just some of them. For example, classifieds that are active and displayed for 3 days might be free, but if the advertiser wants their classifieds to be active for 14 days, they would need to pay $5.
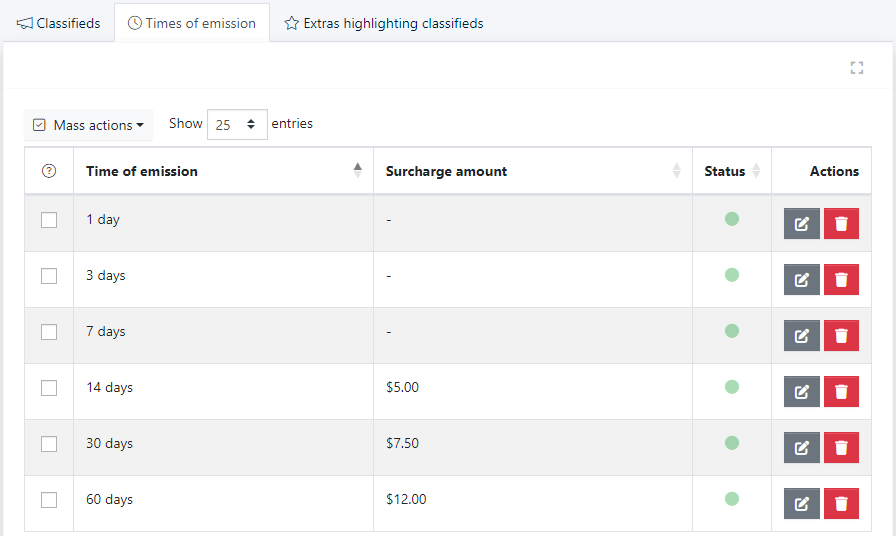
At any time as an Administrator, you can edit each of the existing emission times. To do this, you need to click the "Edit" button in the "Actions" column on the list of broadcast times.
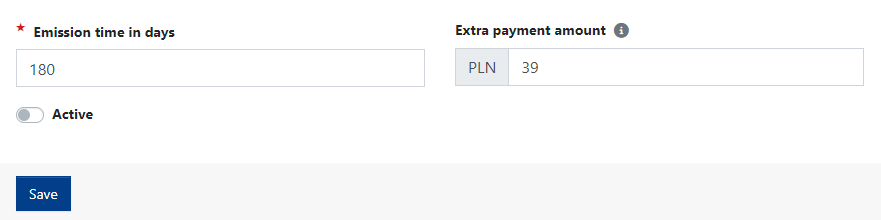
Adding a new emission time
To add a new emission time, such as for 90 days, click the plus icon located at the top above the table.
After clicking, a simple wizard for adding a new emission time will appear, where you will specify:
- The emission time in days - for example, 90 days, 180 days, etc.
- Extra payment amount - how much money the user will need to pay to activate the classifieds for the specified time.
To make the new emission time available for users to choose from, remember to toggle the Active switch to the right.
Similar to classifieds, here you also have the same bulk actions available for the emission times listed.
Extras highlighting classifieds
Extras are special visual elements that allow advertisers to highlight their classifieds.
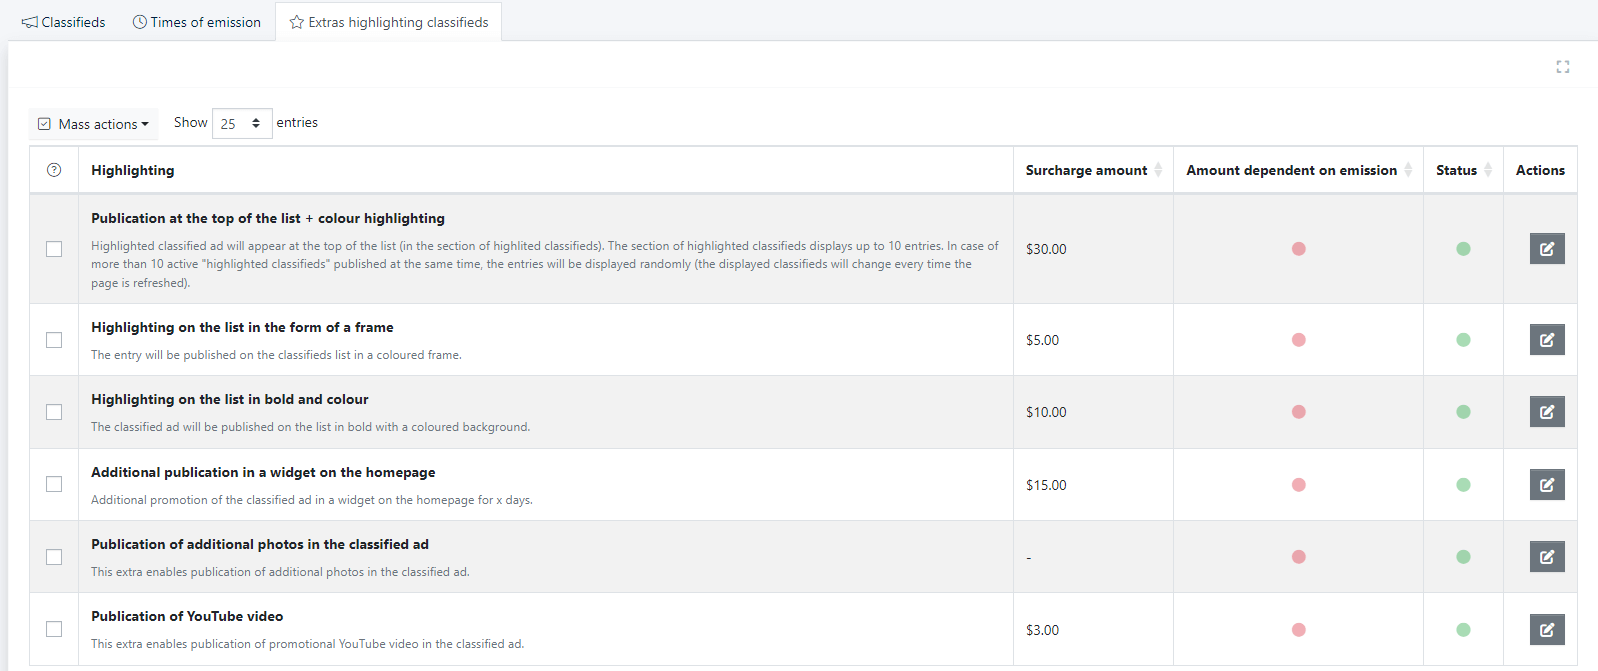
Among the available pre-designed extras, the following options are included:
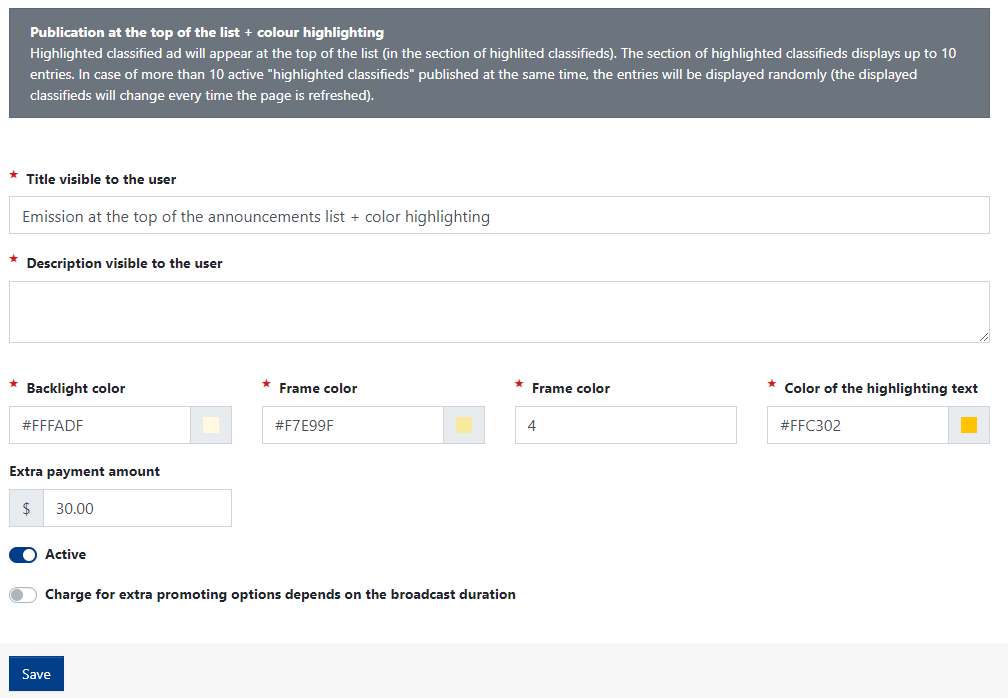
- Publication at the top of the list + colour highlighting: Highlighted classified ad will appear at the top of the list (in the section of highlited classifieds). The section of highlighted classifieds displays up to 10 entries. In case of more than 10 active "highlighted classifieds" published at the same time, the entries will be displayed randomly (the displayed classifieds will change every time the page is refreshed).
- Highlighting on the list in the form of a frame: The entry will be published on the classifieds list in a coloured frame.
- Highlighting on the list in bold and colour: The classified ad will be published on the list in bold with a coloured background.
- Additional publication in a widget on the homepage: Additional promotion of the classified ad in a widget on the homepage for x days.
- Publication of additional photos in the classified ad: This extra enables publication of additional photos in the classified ad.
- Publication of YouTube video: This extra enables publication of promotional YouTube video in the classified ad.
For each of the above options, you can set an individual additional fee, which is the amount the user must pay to highlight their classifieds. You can also customize specific elements of each extras, depending on its type, such as changing the frame's thickness, its color, or the highlighting color.
Categories of classifieds
Classifieds categories can be created arbitrarily in the Categories module according to your preferences. In the 4media CMS, the default categories are:
- Real Estate
- Jobs
- Automotive
- Services
- Home and Garden
- Electronics
- Education
- Miscellaneous
Adding a new classifieds category
If you need to add a new category or expand an existing one with new subcategories, you can do so at any time.
Log in to your admin account in the 4media CMS and go to the Categories module. There, you will find access to various sections, including the main menu, footer menu, article categories, and the classifieds categories that you have on your website.
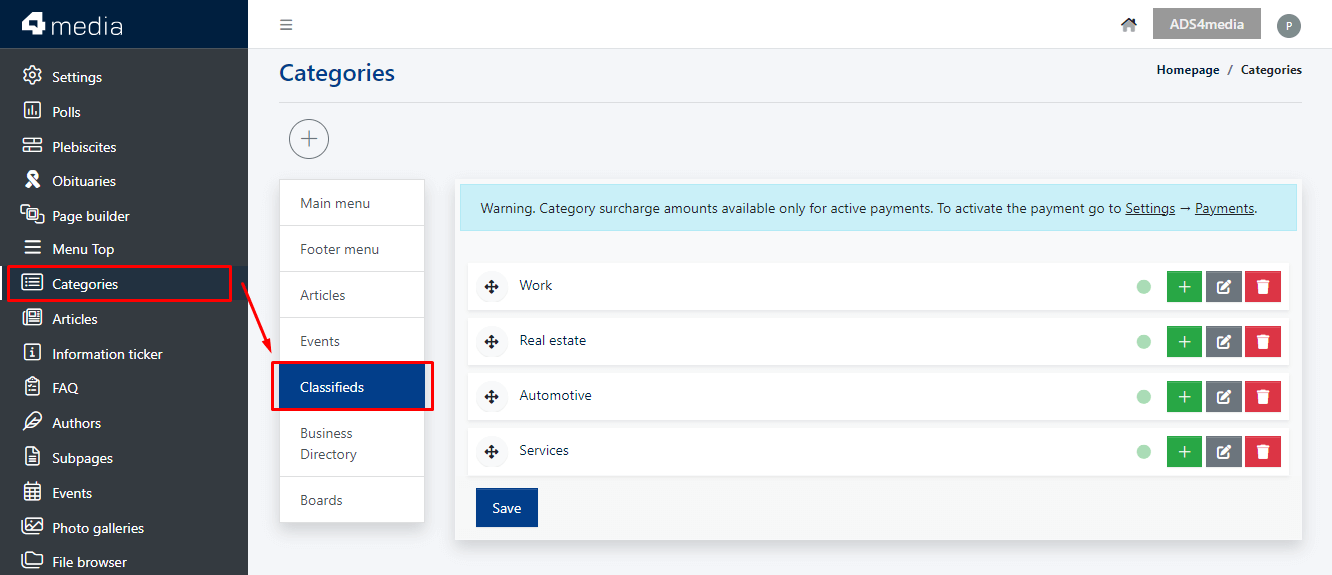
You can modify existing categories by clicking the gray "Edit" button. To add a new category, click on the + (plus) button located above the category menu.
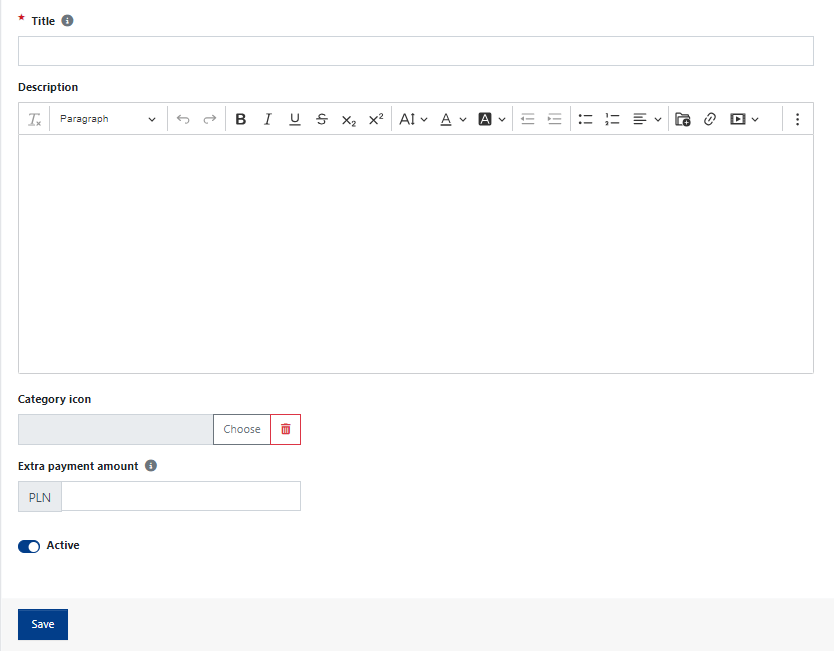
This will open the new category creation wizard, where you'll provide a title, category description, select an icon from the built-in library, specify any additional charges, and activate the category so that users can add their classifieds to it.
Editing extra payment fee
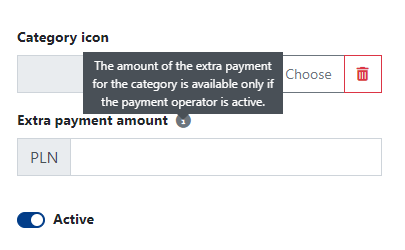
In the Categories module, within the Classifieds menu, you will find the classifieds categories. To add an additional fee for an existing category or change the amount, click the "Edit" button next to the respective classifieds category. In the Extra payment amount section, input or modify the price for listing classifieds and save the changes.
If you wish to make classified submissions in a specific category free of charge, leave the Extra payment amount field empty. If you enter an amount, such as $10, users will be required to pay that fee for submitting classifieds in that category (or any subcategories linked to that category).
Classifieds Settings
Global classifieds settings can be found in the Settings -> Classified ads.
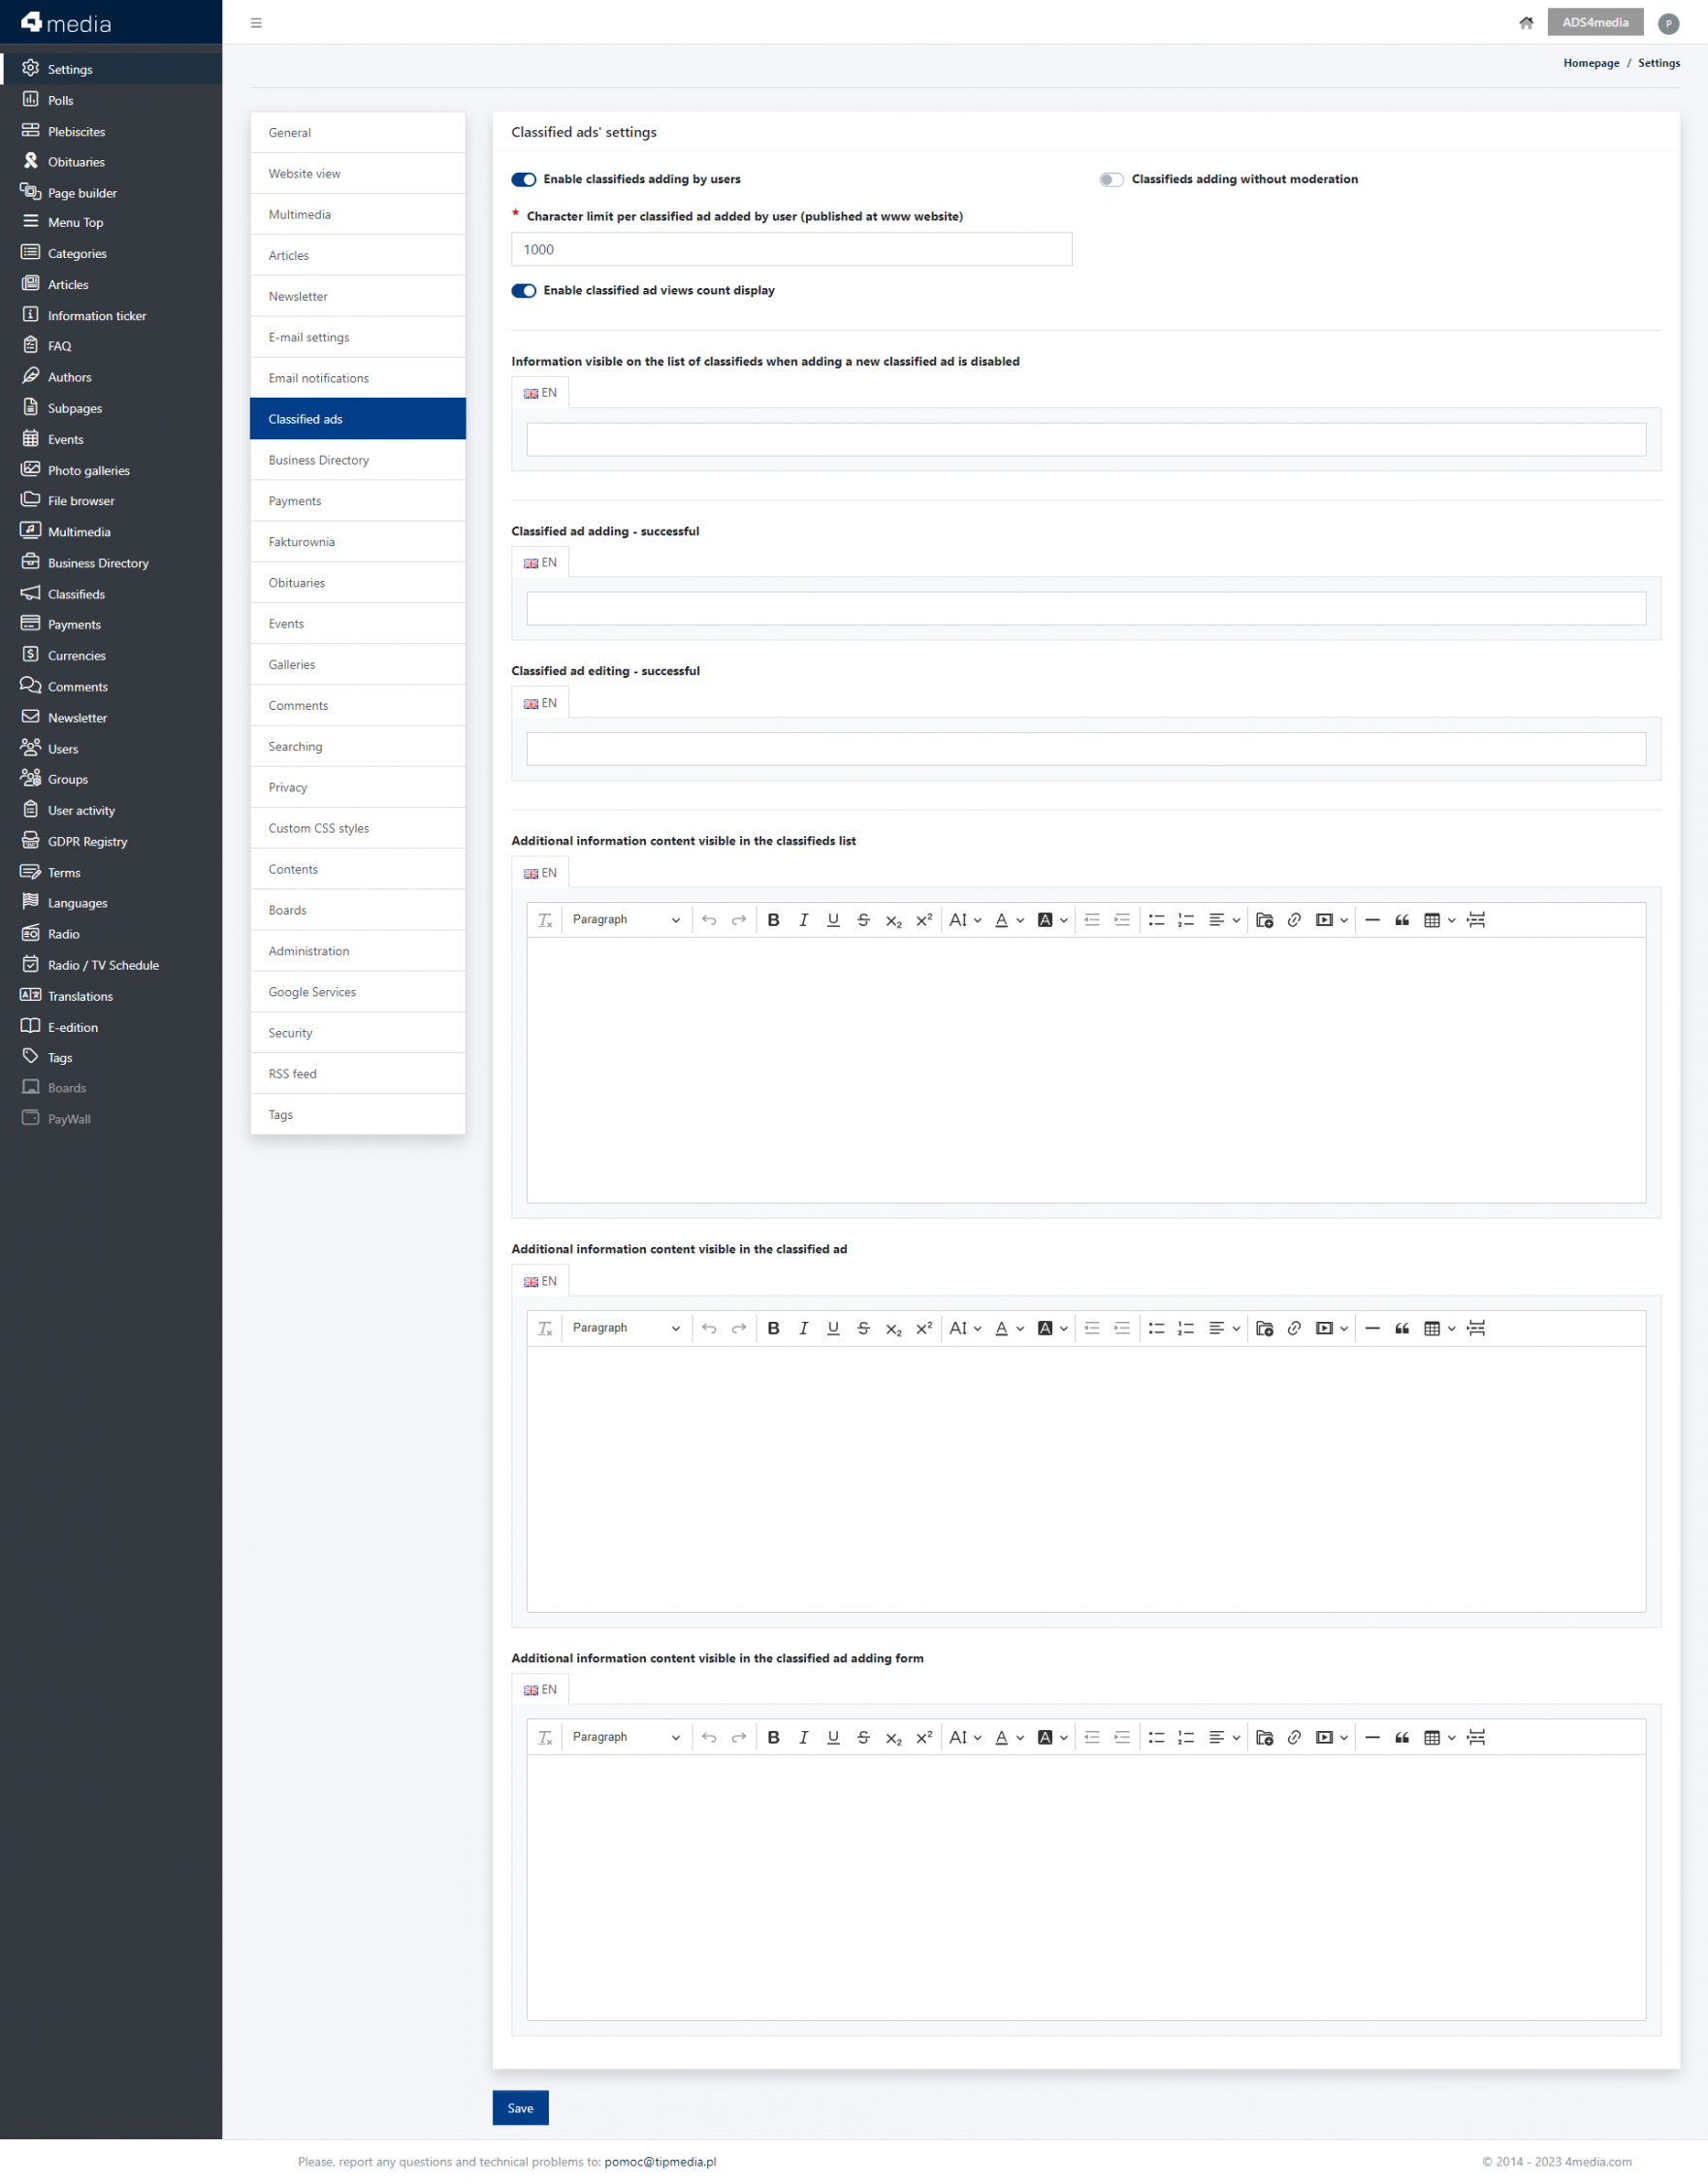
The following options are available:
Enable classifieds adding by users - With this slider, you can enable/disable the ability for users to submit classifieds. If you toggle the switch to the right, you activate the option to add classifieds. In that case, on the all classifieds hub page (e.g. https://demo.4media.com/classifieds), users will see the "Submit classified ad" button and will be able to proceed to the next page where the classifieds form is located.
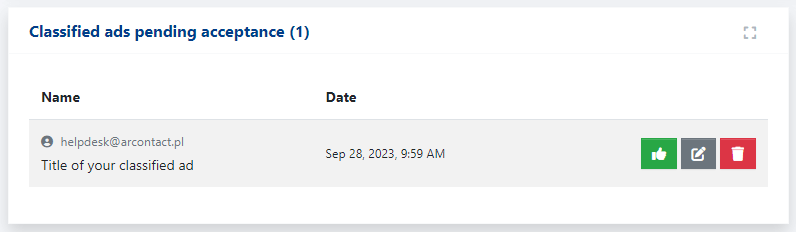
Classifieds adding without moderation - With this slider, you decide whether user-submitted classifieds should go through a moderation process before being published. This serves as a safeguard against publishing unwanted content (e.g., matrimonial classifieds, etc.).
If this option is active, after adding a classified, the user will receive an appropriate message, such as: "The classified ad has been successfully registered in our database. It will be published on our website after verification." The classified itself will appear on the main page of the admin panel under the "Classifieds to Approve" section. It will also be visible in the classifieds list within the Advertisements module.
Character limit per classified ad added by user (published at www website) - Here, you will define the maximum character limit that users can input in the classifieds content (Description).
Enable classified ad views count display - If the switch remains active, information about the number of views (impressions) will be displayed under the classifieds.
Information visible on the list of classifieds when adding a new classified ad is disabled - Here, you can input content that will be displayed to users when classifieds submission is disabled.
Classified ad adding - successful - Content that will be displayed to users when the classifieds submission is successful.
Classified ad editing - successful - Content of the message displayed to users when the classifieds editing is successful.
Additionally, you can fill in additional content that will be displayed in various places related to classifieds:
- Additional information content visible in the classifieds list.
- Additional information content visible in the classified ad.
- Additional information content visible in the classified ad adding form.


