

The Plebiscite Widget in CMS 4media can be added to any template in the Page Builder. This means it can be displayed practically anywhere on any subpage of the website.
To display content, the plebiscite must be previously added in the Plebiscites module. Only active plebiscites can be displayed in the widget.
Adding, Settings, and Configuration of the Plebiscite Widget
To add the plebiscite widget to your page, log in to your administrator account in CMS 4media. In the main menu (on the left), select "Page Builder." Then choose the template to which you want to add the widget and click "Edit."
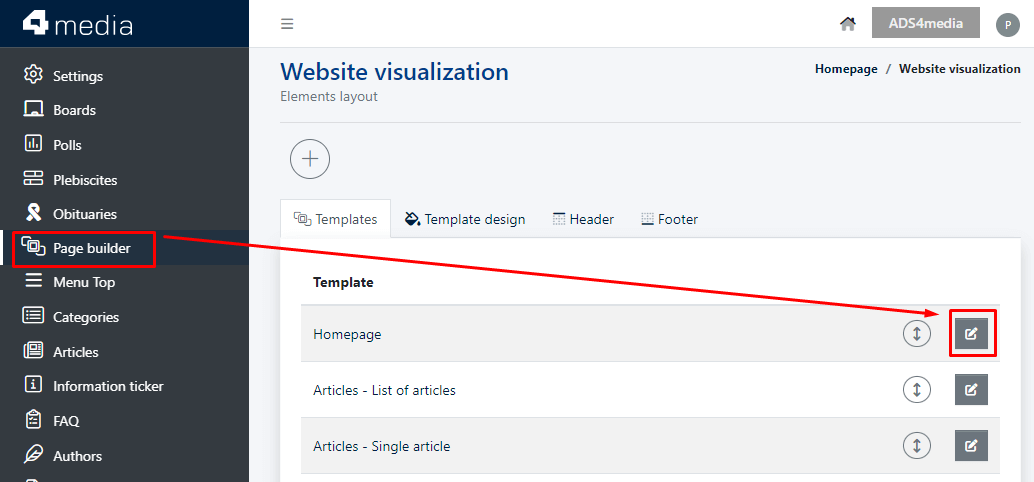
This will open the widget layout editing in the page template. Click the "+ Add item" button to open the widget library. From the list, select "Plebiscite" - the widget will be added to the template, and its settings will automatically appear.
You can read more about adding widgets in CMS 4media in the guide: Adding Widgets in CMS 4media.
Header Settings
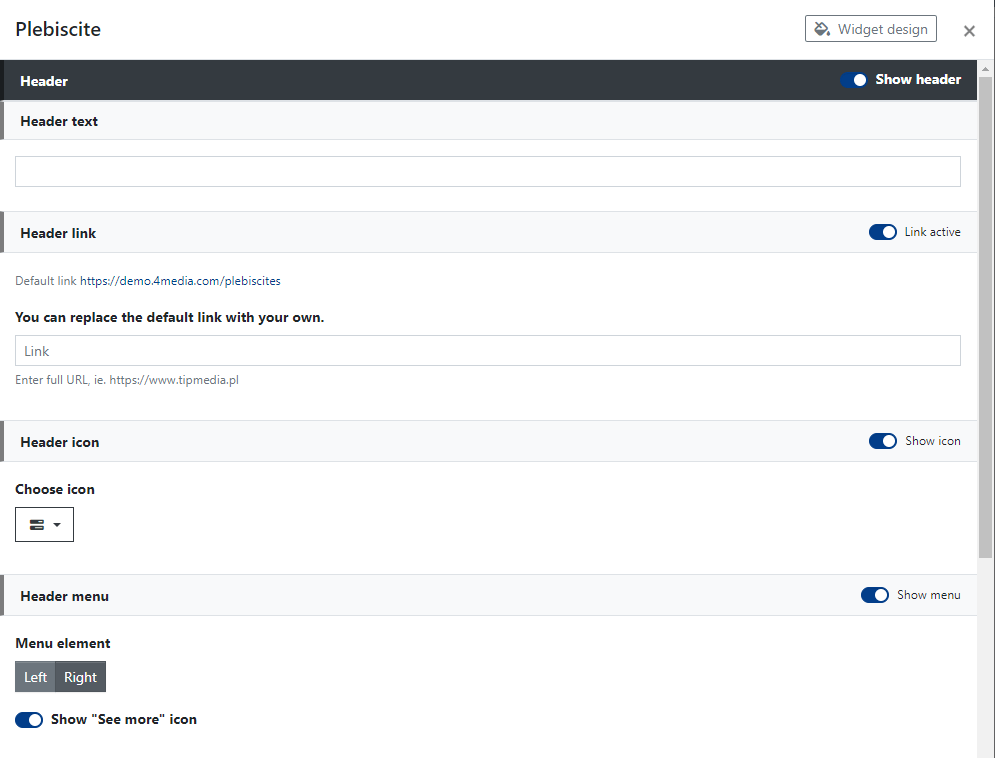
The header allows you to set:
- Header Text - you can enter any short content that will be displayed on the top bar above the widget's content.
- Header Link - if you set the header text and activate the header link (move the slider to the right), the header text will function as a link. By default, it leads to the plebiscites subpage, but you can set it to redirect to a specific plebiscite.
- Header Icon - if you enable the display of an icon in the header, it will be visible before the header text. You can change it by selecting another one from the icon library in CMS 4media.
- Header Menu - allows you to enable control icons (left and right arrows) that allow users to scroll through the widget's content (display other active plebiscites). In the header menu, you can also enable the "See More" button, which will be visible at the bottom of the widget and will redirect to the plebiscite subpage when clicked.
You can also completely disable the header display and configure only the widget's content settings. In that case, the plebiscite will be displayed similarly to the demo website of the CMS 4media system (the first screenshot at the top of this article).
Check out the demo page of the news portal created on CMS 4media at demo.4media.com.
Content Settings
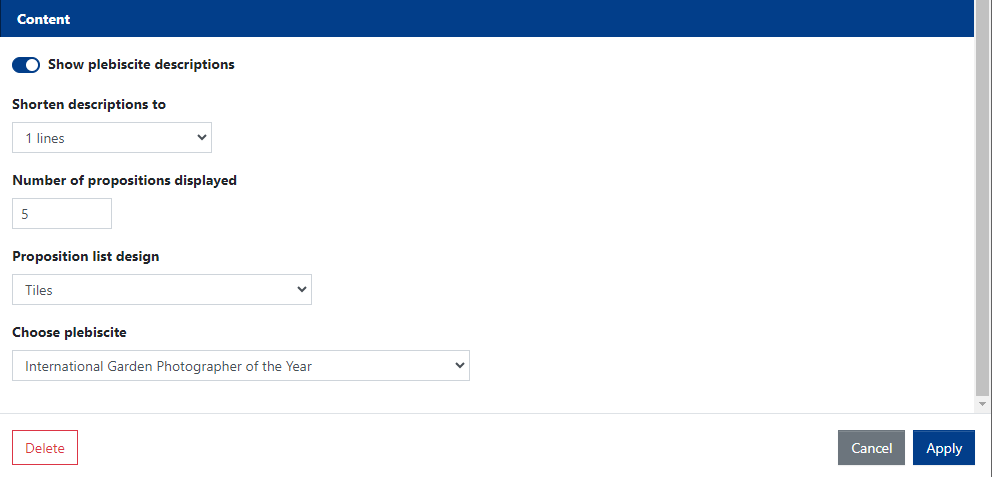
In the content settings, you will specify how the plebiscite, previously added in the Plebiscites module, will be displayed.
In this section, you will set:
- Show Plebiscite Descriptions - if the slider is active (moved to the right), a dropdown list will appear below, allowing you to choose the length of the description displayed in the widget. You can choose from a range of 1 to 4 lines of text.
- Number of Propositions Displayed - in this field, you will decide how many plebiscites will be displayed in the widget. You can enter a number from 1 to 20.
- Propositions List Design - from the dropdown list, you will choose how proposals, on which users can vote in the plebiscite, will be displayed. You have the option to choose from a list, tiles, and settings from the plebiscite module.
- Choose Plebiscite - here, on the dropdown list, you will find published and active plebiscites that have been published in the Plebiscites module.
To save the changes made during the widget configuration, click the "Save" button at the bottom of the widget settings and again the "Save" button in the template editing view to which you have just added the Plebiscite Widget.

")

