
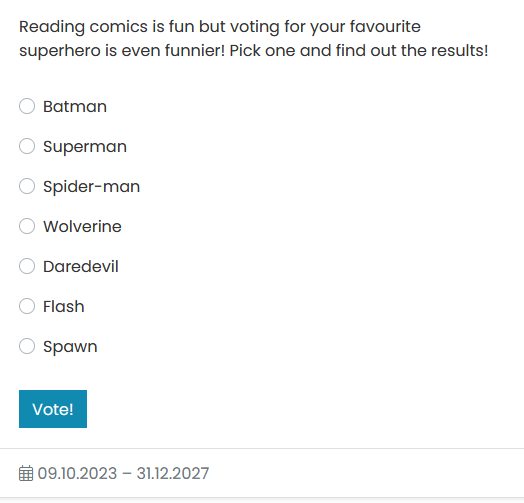
The Polls module in CMS 4media is a special type of poll page that you can create to enhance the attractiveness of your local news website. In each poll, one user can cast one vote for one item.
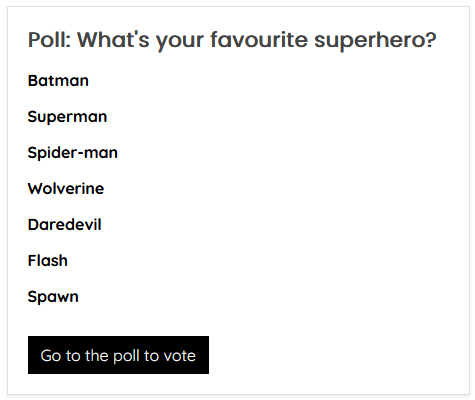
Each poll can be displayed in any page template after adding the poll widget in the "Page Builder" module. All published and active polls are also displayed on a dedicated subpage, e.g., https://demo.4media.com/polls.
Polls can be displayed under articles. During article editing or creating a new one, simply select a previously created poll in the Multimedia section. You can create votes on any topics and issues. Your imagination is the only limit!
Read more about Articles module: Articles module in CMS 4media.
Polls Module - Managing Polls
After logging into the CMS 4media admin panel, select the "Polls" module from the main menu. A list of added polls will appear (it will be empty if no poll has been added previously). The list contains information about added polls. Each newly added poll will also be listed.
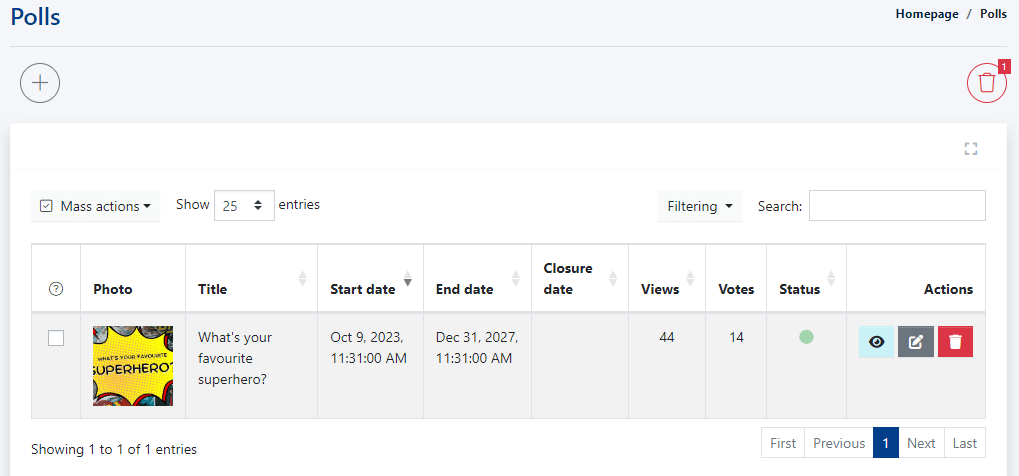
By default, the polls in the table are sorted from newest to oldest. You can change the order of displayed items, e.g., by clicking on the "Start Date" column header.
The table also includes information such as:
- Photo - if a main image is added to the poll, its thumbnail will be displayed.
- Title - poll title.
- Start Date - the date the poll started (added).
- End Date - the poll's end date.
- Closure Date - superior to the end date; closing date closes the voting without ending the poll's duration.
- Views - the number of times the poll page has been visited by users.
- Votes - the total number of votes cast in the poll.
- Status - indicates whether the poll is active (green dot) or not (red dot). Only active polls can be displayed in the Poll widget.
The last column in the poll list is Actions:
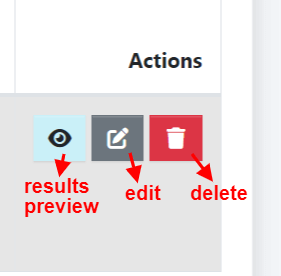
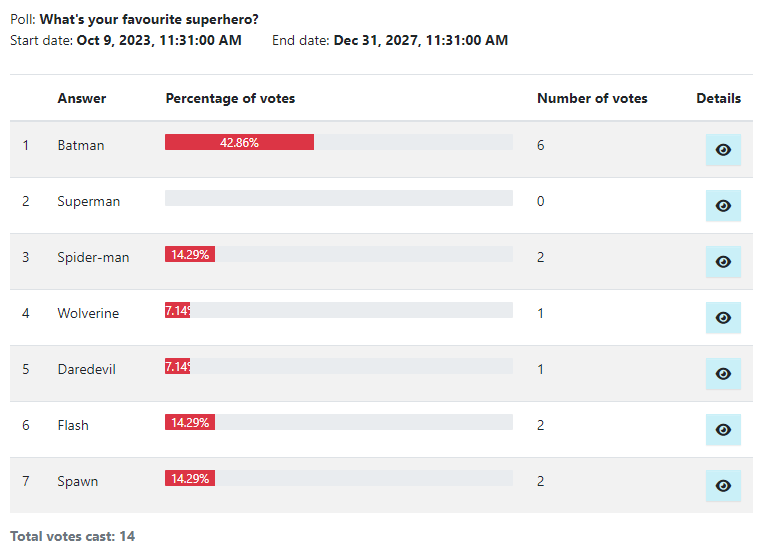
Results preview - clicking this button will display detailed voting results (see the screenshot below).
Edit - clicking it will take you to edit the poll details. You can change the title, description, add/remove the main image, or change start, end, or closing dates.
Delete - clicking it moves the poll to the trash (it can be restored from there).
Adding and Poll Settings
To add a new poll, go to the Polls module and click on the plus button in a circle located above the list. It will open a new poll creation wizard.
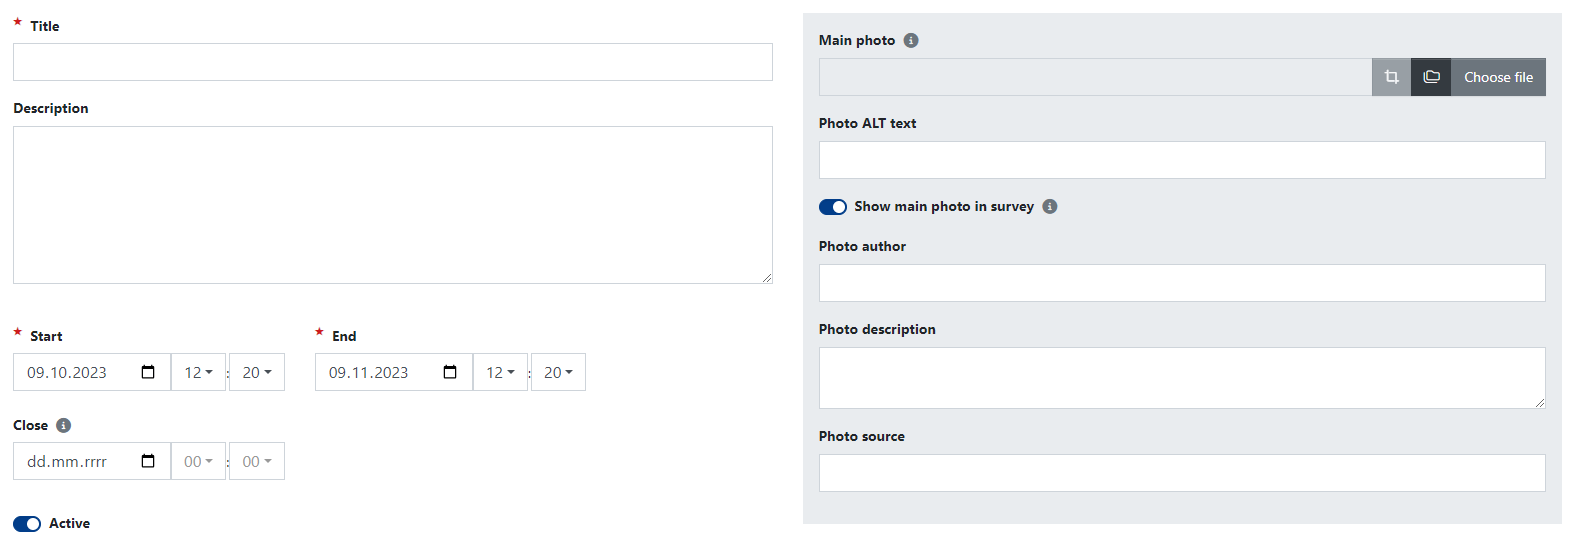
In the descriptive part, you will set:
- Title - the poll title - visible on the poll subpage, displayed in the poll widget, and functions as the poll page's URL address.
- Description - a short text fragment where you can describe the voting details in the poll.
- Start - the start date of the voting in the poll.
- End - the end date of the voting in the poll. After this date, a message about the poll's completion, e.g., [Voting closed], will be displayed next to the poll title.
- Close - allows closing the voting without ending the poll's duration.
- Main photo - if desired, you can upload an image or graphic in JPG or PNG format here; it will be displayed as the poll's thumbnail, e.g., on the poll subpage. You can also fill in other fields, such as the alt attribute (Alternative Text for the Image), image author, image description, and specify the image source.
The poll settings part mainly allows you to add items for users to vote on. To add a new item, click the "+ Add Answer" button. A text field will appear where you can enter your suggestion.

In the poll settings, you can also specify:
- Survey for logged in users only - if the slider is active (moved to the right), only registered and logged-in users of the website can vote in the poll.
- Survey summary visible to the public - if the slider is active, users will immediately see a summary with the number of votes for each item after voting in the poll.
- Show number of votes next to the percentage - if the slider is active, the poll summary will also show the percentage distribution of votes, e.g., 50% (3 votes).
After making all changes and settings, click the blue "Save" button at the bottom of the page to save the changes.

