
Article Management in the Article List
The Articles module in the CMS 4media is the heart of your local news website. Here, in an easy-to-use text editor enriched with many useful functions, you will be able to quickly publish the latest news.
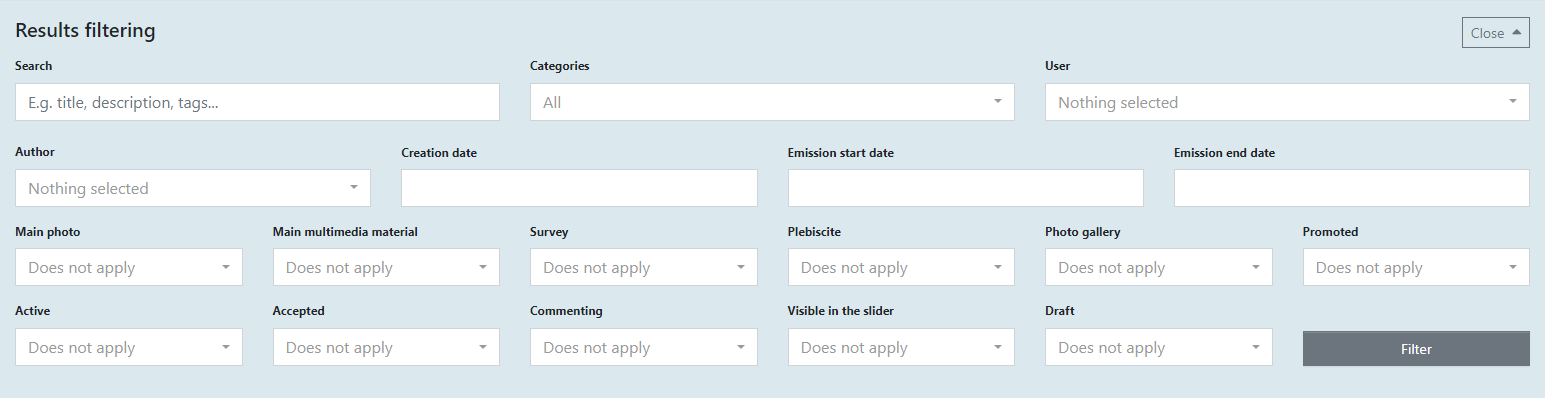
Upon entering the Articles module in CMS 4media, the publisher can see the list of added articles. From there, you can search for specific words, edit, or delete a particular entry. In addition, you have the ability to filter entries, such as those added to the slider or promoted, etc.
There are also bulk (mass) actions available for all or selected articles at once:
- Change status to active
- Change status to inactive
- Accept
- Revoke acceptance
- Delete
On the list of articles, you can see:
- Title
- Category to which the articles are assigned
- Date of addition and start of publication
- Number of article views
- Status - marked with a green dot (active) or red (inactive)
- Consent - marked with a green dot (approved) or red (unapproved)
- SEO - marked with a green dot (optimal SEO settings), yellow (recommended SEO settings improvement), or gray (no SEO settings).
Article Editing
By clicking the plus icon on the left side above the list of articles, you will be directed to a page for adding a new article. There, you can fill in fields for the title, lead (introduction), and content. You can also add some tags.
Content Editor
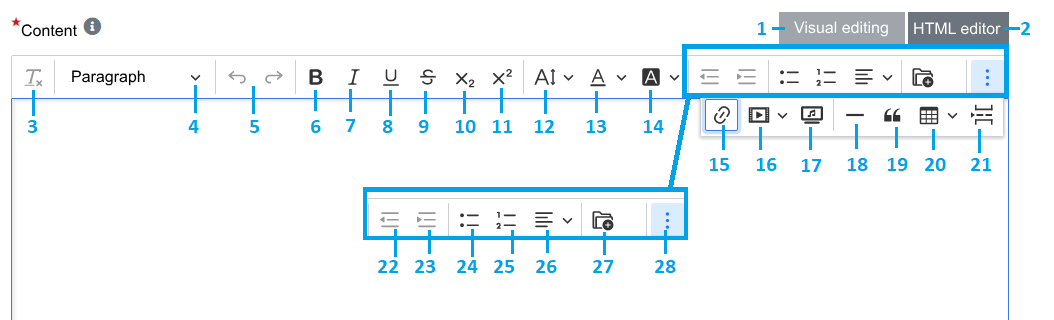
1. Visual editing
2. HTML code editing:

3. Clear formatting
4. Paragraph style change: Paragraph, Small Text, Big Text, Heading 2, Heading 3...
5. Undo / Redo
6. Bold
7. Italic
8. Underline
9. Strikethrough
10. Subscript
11. Superscript
12. Font size
13. Font color
14. Font background color
15. Insert link
16. Insert media from URL (e.g., from YouTube, Facebook post, etc.) See also Adding a Link to Another Page
17. Upload multimedia (video, audio, live stream) from the server
18. Insert a horizontal line
19. Insert a blockquote
20. Insert a table
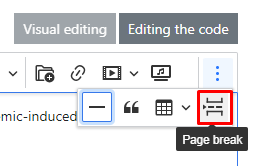
21. Insert page break
22. Decrease indent
23. Increase indent
24. Insert bulleted list
25. Insert numbered list
26. Text alignment (left/right, center, justify)
27. Insert an image or file from the server
28. Show more items
Adding an Image to Article Content
By clicking on the "Insert image or file from the server" icon, a window with the File Library opens, from which you can select an image. You can also upload a file from your device to the File Library and then use it in the article content.
See also the File Library section.
After adding the image, you will have options:
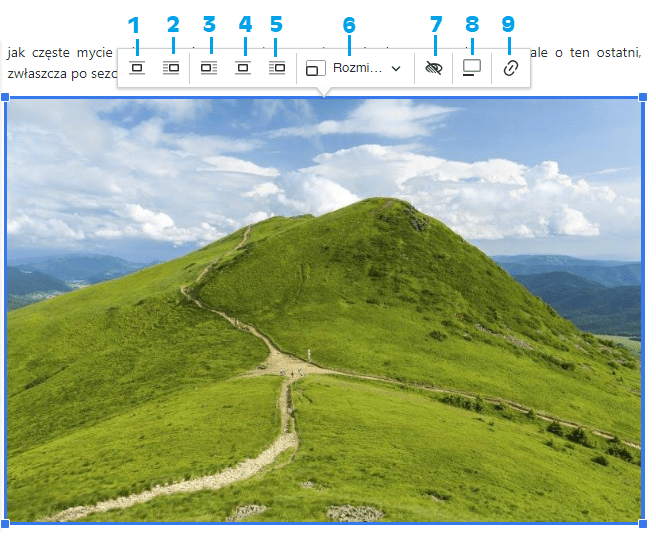
1. Image between text paragraphs
2. Image wrapped by text
3. Image wrapped by text aligned left
4. Image between text paragraphs centered
5. Image wrapped by text aligned right
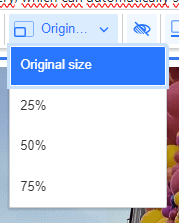
6. Resize image:
7. Editing the alternative text of the image (alt attribute editing)
8. Editing the caption below the image
9. Link image
You can manually adjust the image size:
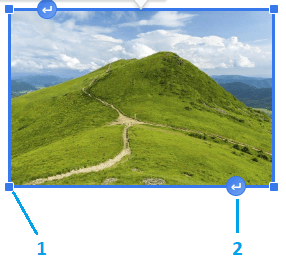
1. You can adjust the image size by dragging the blue square with the mouse.
2. Inserting a paragraph below/above the image
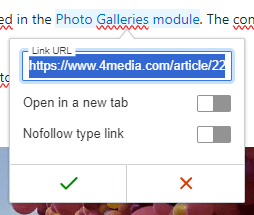
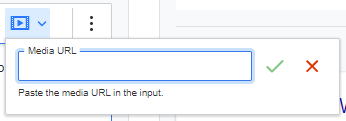
Adding a Link to Another Page
To add a link to another page in the article content, you can use the "Insert media" button and add a URL link in the field, e.g., to another article.
SEO Settings
With SEO settings, you can have a greater impact on the appearance of the article title and description in search engines. You can also decide whether search engines should index the article or exclude its visibility in search engines.
Details regarding configuration and useful tips can be found in the article: SEO Fields. How to Use?
Basic Article Settings
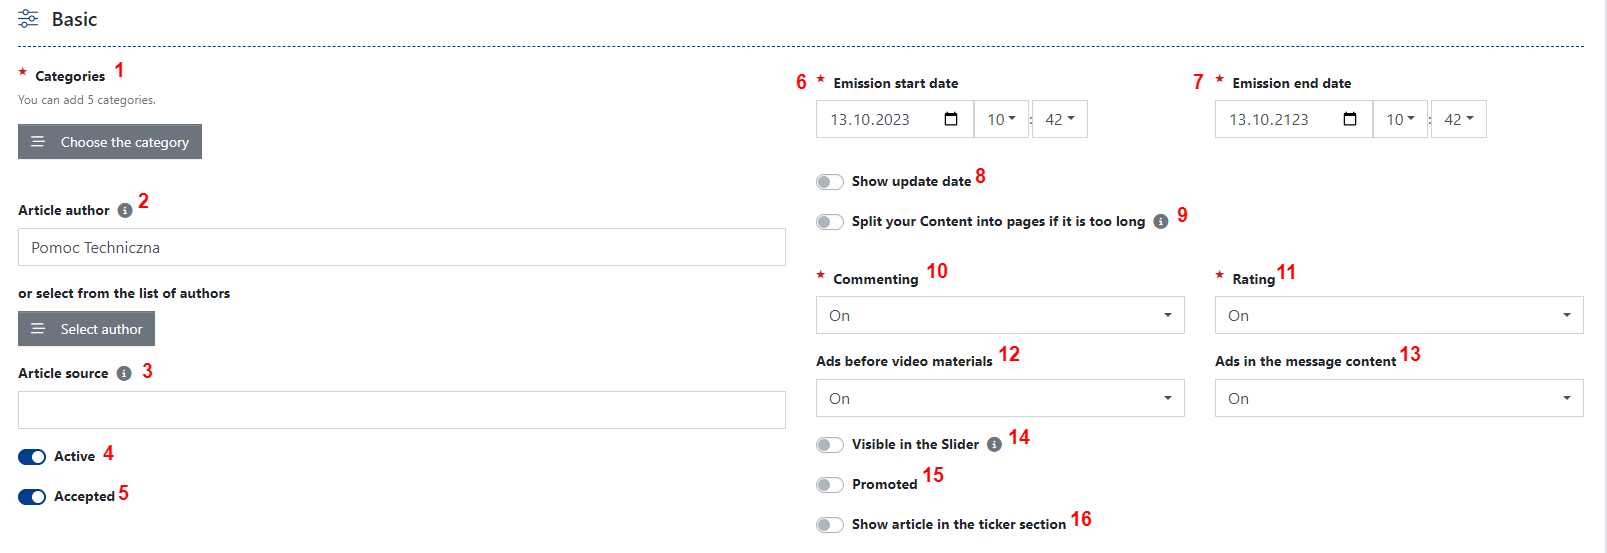
1. Select a category from those established on the website (in the Categories → Articles module).
2. Article author - you can enter manually or select from the list of authors established in the Authors module. See also: Authors module.
3. Article source - displayed instead of the author.
4. Article status (active / inactive).
5. Article approval status.
6. Start date of publication.
7. End date of publication (default set to 100 years).
8. Show update date:

9. Split the content into pages if it's too long (Page break). Division will follow the content settings using the icon:
10. Commenting
By default, the article is either open for comments or closed based on system settings (Settings → Comments → Global comment lock). In the Commenting field, you can disable comments for a specific article, for example. Learn more about how comments work in CMS 4media: Comments module.
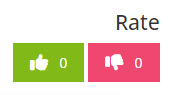
11. Rating - allows enabling or disabling article rating:
12. Disable / Enable ads before video content.
13. Disable / Enable ads in the news content (in Articles)
14. Display in the Slider - to make an article visible in the slider, it must have a main image. Depending on the slider settings (Page builder → [choose a template where the widget is visible] → edit the "Slider" widget → Content), the slider will display:
- The latest articles if the List of Items option is selected
- Selected articles if the Selected Items option is selected.
15. Promoted - promoted articles will be displayed in news widgets with the All Articles or Only Promoted Articles option selected (Page Layout → [choose a template where the widget is visible] → edit widget → Content → Promoted Articles).
16. Show the article on the information bar (also read the Information Ticker article).
Paywall / Registration Wall
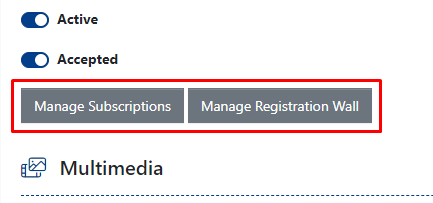
Basic settings also include buttons that lead to Paywall / Registration Wall settings. By clicking on the chosen button, you can decide whether the article you are adding/editing should be added to existing Paywall / Registration Wall plans or whether the content should be publicly available to all users (e.g., unregistered and non-subscribed readers).
Learn more about the settings and configuration of plans: Paywall and Registration Wall module.
Multimedia
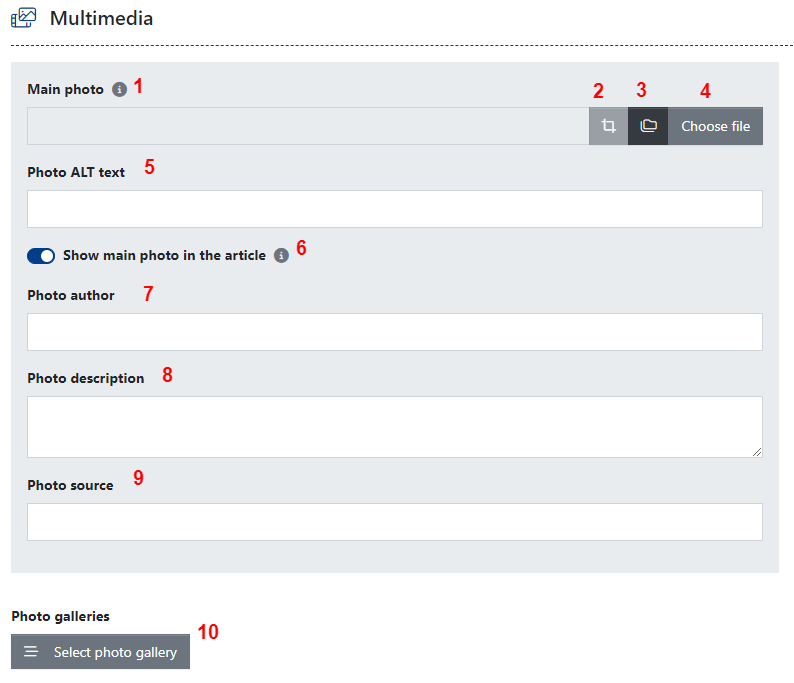
Main photo
1. Main photo in JPG or PNG format. The minimum image size is 540x540px, but it is recommended to upload images with a width of at least 1500 px. The maximum file size is 10MB
2. Cropping the image - applies to the thumbnail of the image in widgets and article lists. The full image will be displayed in the article content.
3. Choose photo from the file library
4. Choose a file from your device
5. Alternative image text (alt attribute) - for concise description of the image content, positively affecting page positioning, and helpful for visually impaired individuals.
6. Show the main photo in the article - allows displaying the main image in the article. If this option is deselected, the main image will be shown only as a thumbnail in the article lists and widgets.
7. Photo author
8. Photo description - a description visible below the main image
9. Photo source
Additional Elements
10. Photo galleries - allows displaying previously added photo galleries in the article.
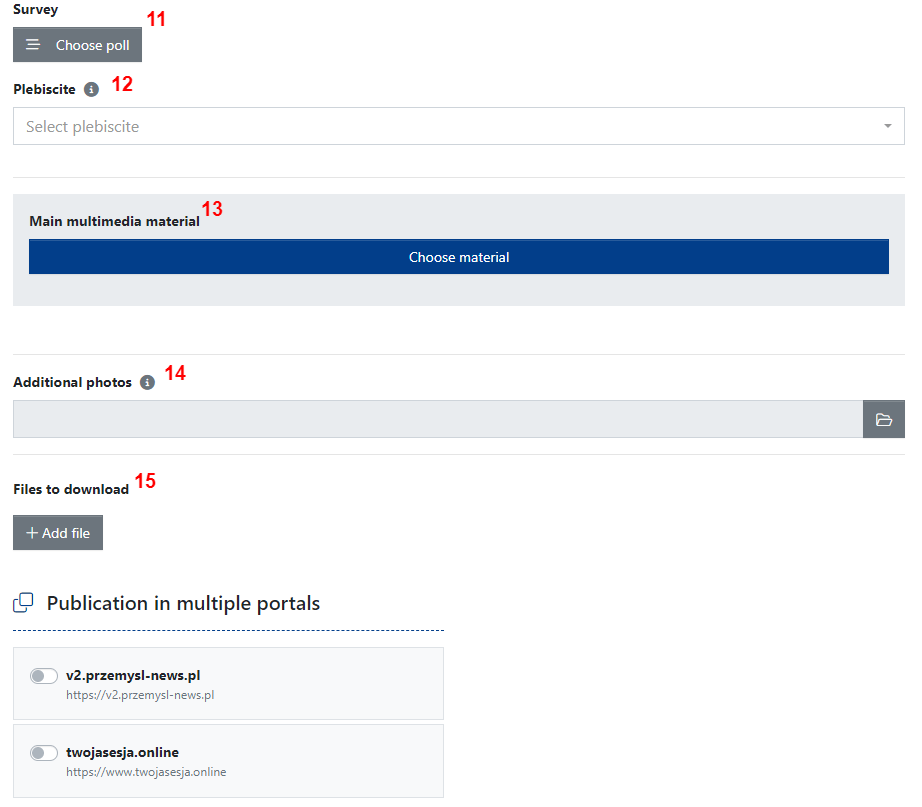
11. Polls - allows displaying a previously added poll in the article..
12. Plebiscite – allows displaying a previously added plebiscite in the article.
13. Main multimedia material - allows displaying video, audio, or live stream material in place of the main image. If the main multimedia material is added, the main image will only be displayed as a thumbnail in article lists and widgets.
14. Additional photos - allows adding multiple images to the article. You can add several images, but it's important that the file size of each image does not exceed 10MB. The minimum image dimensions are 540x540 px.
Uploading images may take several minutes depending on their number, size, internet connection speed, etc. After uploading each image, you can edit it:
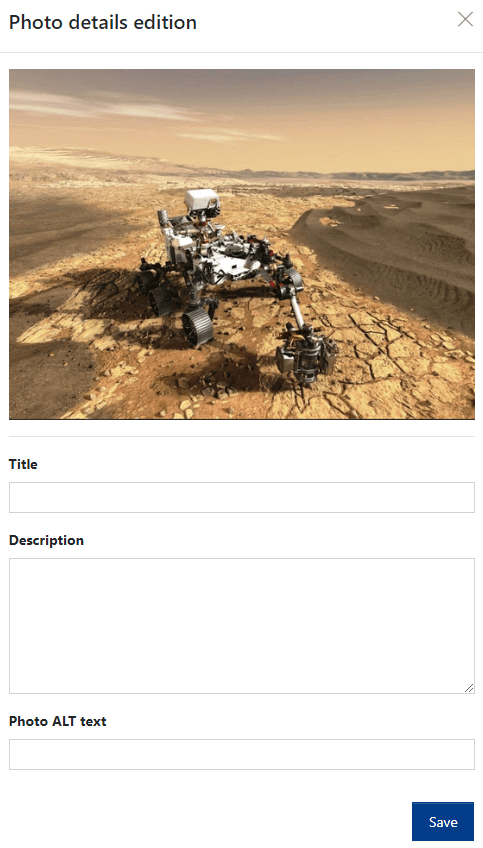
After adding images, you can create a photo gallery from them using the "Create a Photo Gallery" button.
15. Files to download - allows uploading PDF files or images for user download.
Publication on Multiple Websites
For publishers with multiple websites running on CMS 4media, the Multisite function is available. It allows you to add an article to multiple websites simultaneously (Settings → Articles → Enable Multisite function).
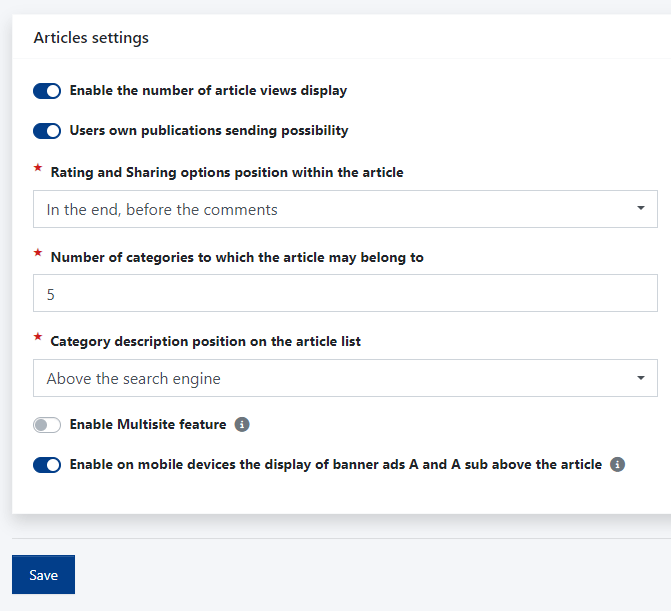
Article Global Settings
Settings such as enabling the number of views under the article or the number of categories to which the article can belong can be found in the Settings → Articles module.
Displaying Articles in the News Widget
A dedicated widget for displaying articles on the homepage is the News widget. In this widget, you can configure how articles are displayed and in what way.
Learn more about the settings and configuration in the guide: News widget.


")
