
Here are a few examples of what you can do with the widget:
- Adding Content - You can place texts, images, links, and other content on the page, customizing them to your needs.
- Styling with CSS - Introducing custom styles to tailor the appearance of elements on the page.
- Adding Interactivity with JavaScript - Enabling user interaction on the page, such as event handling, form validation, animations, etc.
- Integration with External Resources - Adding external libraries, style files, scripts, etc.
See how we used the widget to create the "Our Products" section on the homepage of 4media.com:
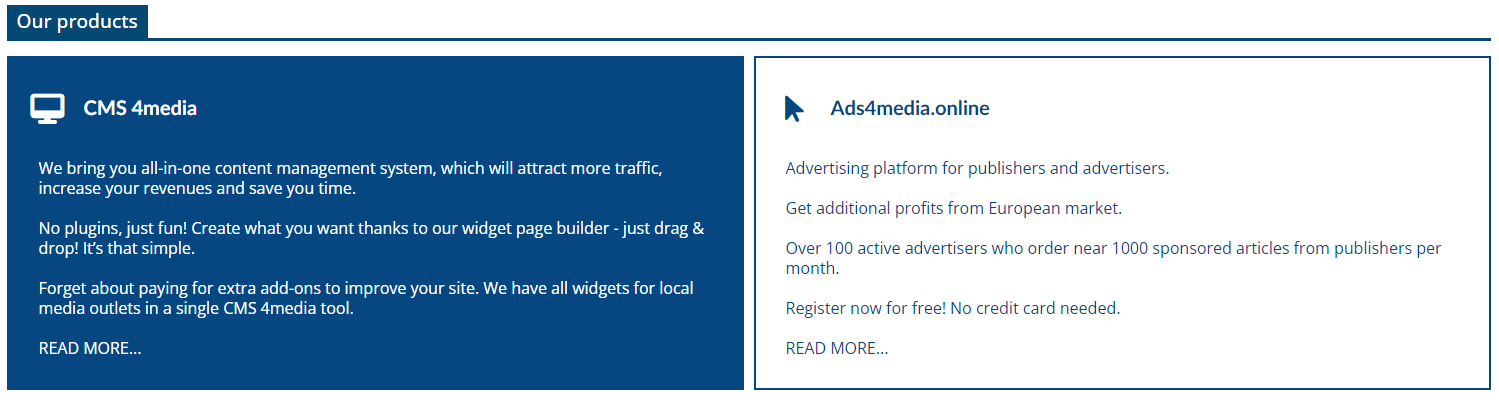
In the widget, you can directly paste pre-written HTML code or use the auxiliary editor, which includes a visual text editor. In the visual editor, you can design what you need, and CMS 4media will automatically generate HTML code in the adjacent window that you can use and publish.
Adding the widget
The Custom HTML Code Widget has no limitations on multiple use. You can add it to a template as many times as you need.
To add the widget, you need to:
- Log in to the administrator panel in CMS 4media.
- Select the Page Visualization module in the main menu.
- Choose the template to which you want to add the widget and click on the "Edit" button.
- In the place where you want the widget to be, click the "+Add Element" button. You can later change the widget's position with the "drag and drop" method.
- After clicking the "+Add Element" button, the CMS 4media widget library window will open. Locate the Custom HTML Code Widget and click on it to go to the content configuration.
Watch the instructional video: Adding a Widget.
If you need advanced settings for shadows, spacing, frames, or individual styling with CSS classes, click on the "Widget Design" button at the top of the configuration window.
Check our guide: Changing Widgets and Templates Design.
Widget Header Settings
When the widget configuration window opens, the Header section will be collapsed (the "Show Header" button will be unchecked). If you click on it, the following options will appear:
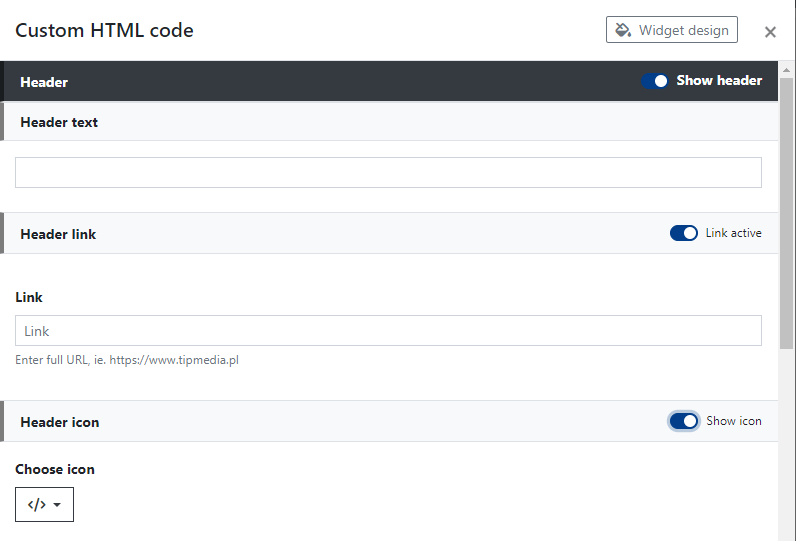
- Header Text - you can enter your own short text here, e.g., "Our Products." This text will be displayed as the header above the widget content.
- Header Link - if you activate the "Link Active" switch, you can paste any link here to link the Header Text.
- Header Icon - if you activate the "Show Icon" switch, the default widget icon will be displayed before the Header Text. You can change it by selecting another one from the built-in icon library by clicking "Choose Icon."
Widget Content Settings
In the content settings, you will find three windows that you can use to embed your own HTML code:
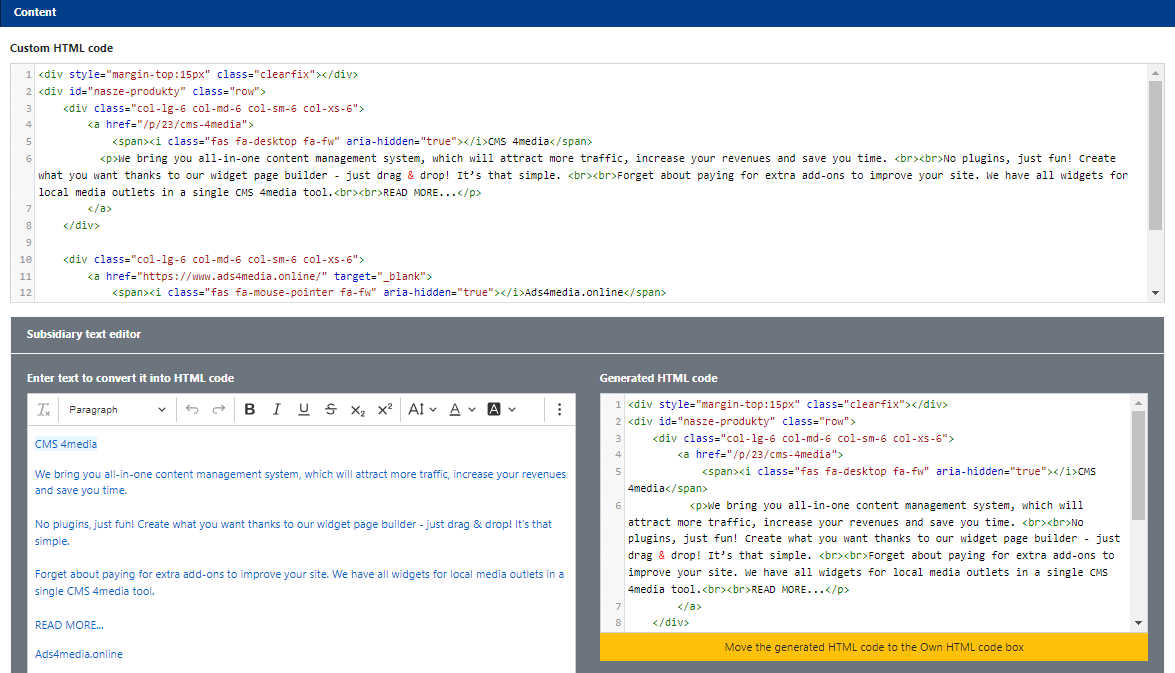
1) Custom HTML Code - the main window where you can immediately paste ready-made HTML code or where you can move the generated code from the "Generated HTML Code" window. This window is the main and most important source from which the widget retrieves information about the code and displays it on the news website. This means that if you make changes in the "Generated HTML Code" window that you do not transfer to the "Custom HTML Code" window, they will not be visible in the widget after saving changes (clicking the blue "Apply" button).
2) Enter text to convert to HTML - a simple, visual text editor containing all the essential functions for creating texts, similar to those found in the Articles module or the Text widget. You can use it for preliminary formatting of text that you want to work with further in HTML format.
3) Generated HTML Code - here, in real-time, you will see what is entered in the visual text editor, i.e., in the "Enter text to convert to HTML" window. In this window, you can also make direct changes by adding your own lines of code. If the code is ready, or if you want to check the changes you made, remember to click the "Move generated HTML code to Custom HTML Code" yellow button. Only after this action confirm the changes by clicking "Apply" and "Save" on the edited template to which you added the widget. Otherwise, the changes made in the widget will not be saved.
The entire workflow to be correctly saved should follow the following scheme:
Enter text to convert to HTML → Generated HTML Code → Move generated HTML code to Custom HTML Code → Custom HTML Code.
This scheme does not apply if you create code in an external tool such as an online code editor (like Codepen.io). In that case, if you are sure the code is correct, you can paste it directly into the "Custom HTML Code" window and save the changes.
Note! If you use your own CSS classes in the code, make sure that the appropriate rules have also been added in Settings → Custom CSS Styles. Otherwise, your code may not work correctly.
Remember that placing your own HTML code is your responsibility for code correctness and protection against Cross-Site Scripting (XSS) attacks. It's essential to ensure the security of your website and adhere to good programming practices.


