
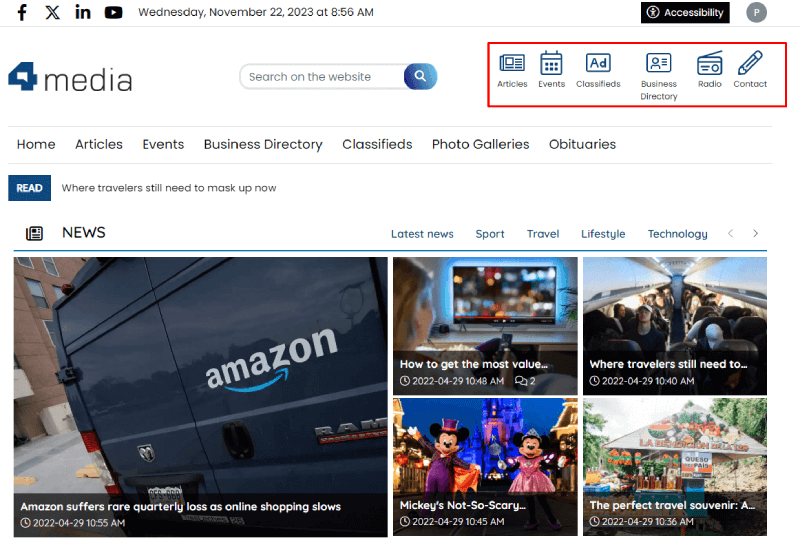
The Top Menu in CMS 4media allows for displaying additional icons that can create, for example, primary or secondary menus on your news website.
The icons are prominently placed and permanently pinned there, so you can take advantage of the Top Menu and create shortcuts to the most frequently visited categories by users or include links to subpages such as "About Us," "Contact," "Advertising" etc.
Enabling the Top Menu
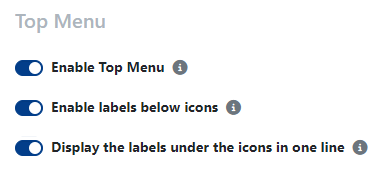
You can enable or disable the Top Menu in the Page Builder (Website Visualization) module → Header → Top Menu.
In this place, you can also:
- Enable labels under icons
- Set the display of labels under icons in a single line
Below are examples of applying different Top Menu settings:
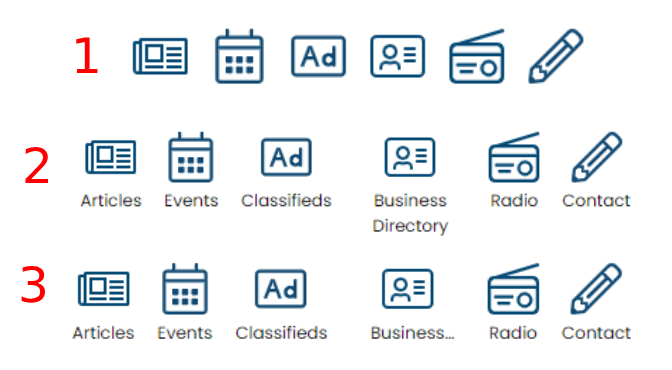
- Top Menu without labels.
- Top Menu with labels.
- Top Menu with labels under icons in a single line.
Category List
Managing the Top Menu is available in the Top Menu module. Upon entering the module, you can see the list of Top Menu categories:
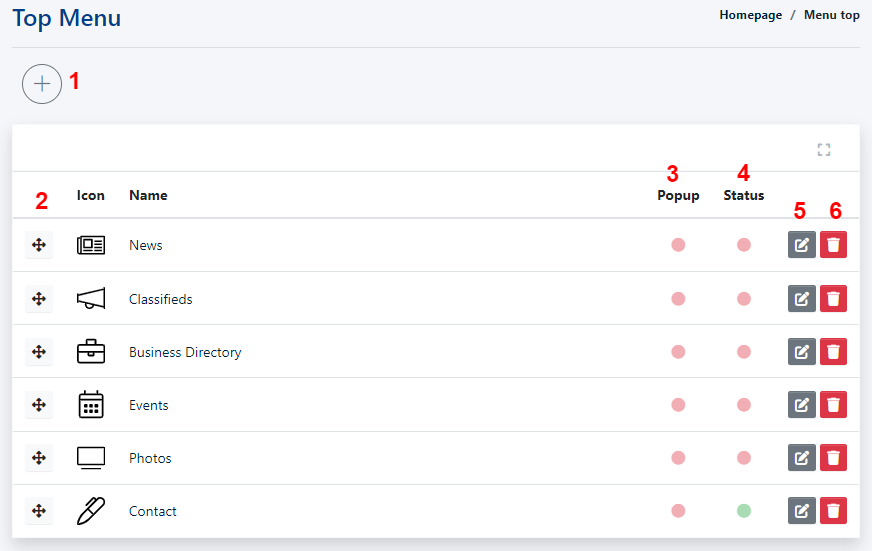
- Add menu item button
- Change position button (drag and drop)
- Icons indicating whether the link for a particular category should open in a pop-up window (green color - yes, red color - no)
- Icons indicating whether the category is active (green color - yes, red color - no)
- Edit button
- Delete button
Adding a new Top Menu category
After clicking on the plus icon at the top left, the user is directed to the page for adding a new Top Menu category.
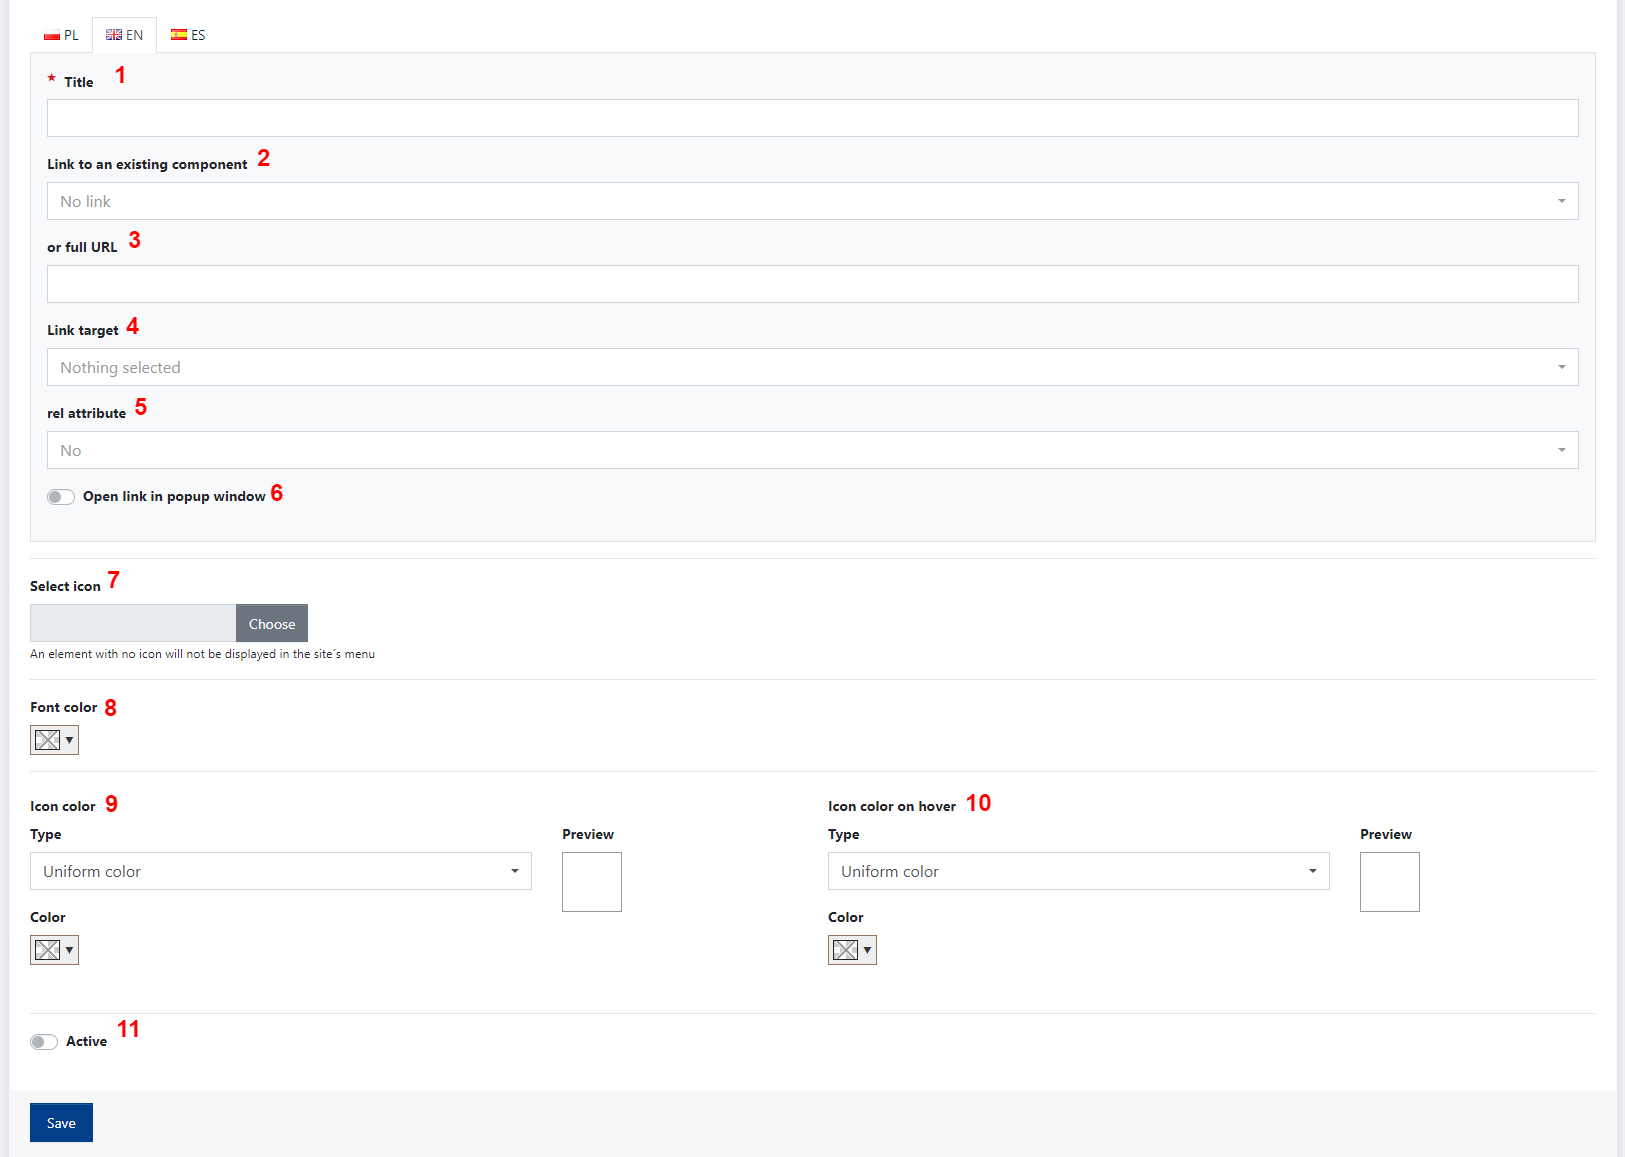
- Category title - will be visible under the icon if labels are not disabled.
- Link to an existing component - Link to an element existing on the website, e.g., a selected module, category, or subpage.
- Full URL address - here you can paste any link in the form of a URL address. The link can refer to a selected page on the website or on another site.
- Link target - Link opening method; setting whether the link should open in a new or the same window.
- Link rel attribute - options include none, nofollow, or external.
- Open link in a popup window - when this option is selected, the link will open in a smaller window that does not occupy the entire browser window.
- Select icon - here you can choose icon from the list implemented in CMS 4media icon library.
- Font color - font color of the label under the icon.
- Icon color - you can set a solid color or a gradient.
- Icon color on hover - you can set a solid color or a gradient.
- Active - Category status change. If set to “Active” then the category will be displayed.

