The Space Widget in CMS 4media allows you to increase the vertical space between one widget and another. It is a widget dedicated to designing the appearance of the page, similar to the Separator widget.
The space is generated as a transparent background. This means that if the website has a white background, the space will also be in white color.
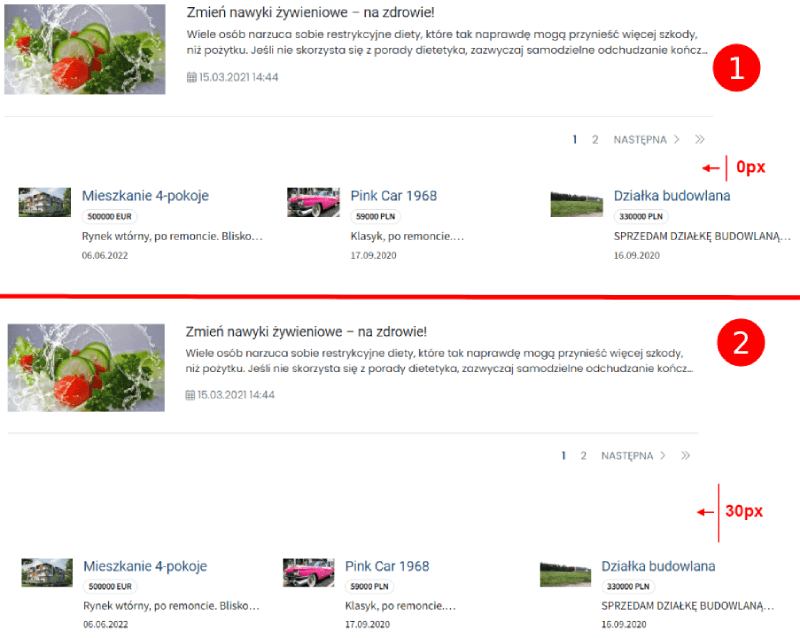
Take a look at the screenshot below to see how the widget is used in practice:
Adding the Widget
You can add the widget as many times as needed to each page template. This means that each can have different settings.
To add the widget to the page template, log in to the administrator account in CMS 4media.
Then, from the main menu, select the Page Builder (Website Visualisation) module.
Next, choose the template you want to modify from the template list. To edit it, click the "Edit" button.
Then choose where you want to add the Space Widget. Click the "+Add item" button to open the widget library, from which you will choose the appropriate widget (you can use the search).
After clicking on the widget name, the configuration window will open.
Read our step-by-step guide: How to add a widget in CMS 4media?
Widget Configuration
Widget settings are straightforward and should not be difficult for you.
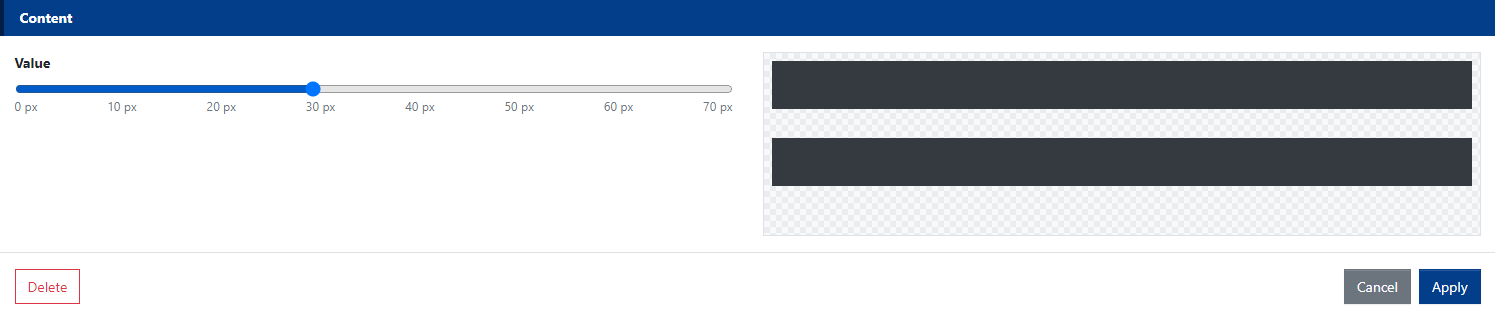
In the "Content" section, there is a switch that allows you to set the number of pixels, i.e., the height of the space. It is a range from 0 to max. 70 px. Move it to see how the space will look in the adjacent window.
Once you have set the appropriate space, click the "Apply" button in the widget configuration window, and then "Save" the changes to the template to ensure everything is saved and published on the website.
At any time, you can go back to editing widget settings - change the space value, duplicate it, or disable its visibility, for example, on mobile devices.
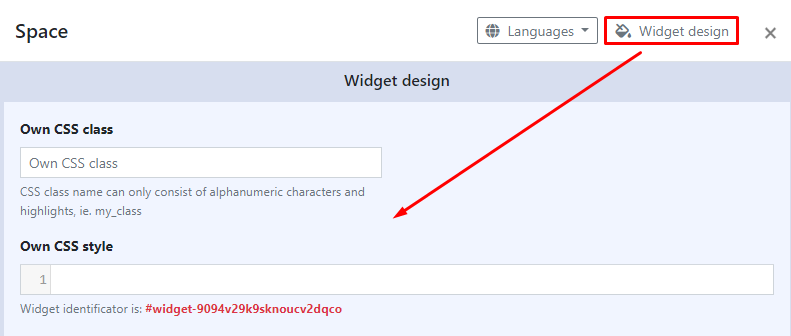
Additionally, clicking on the "Widget Design" button will expand a section allowing you to add your own CSS classes. This way, you can have more control over the widget's appearance if needed.