
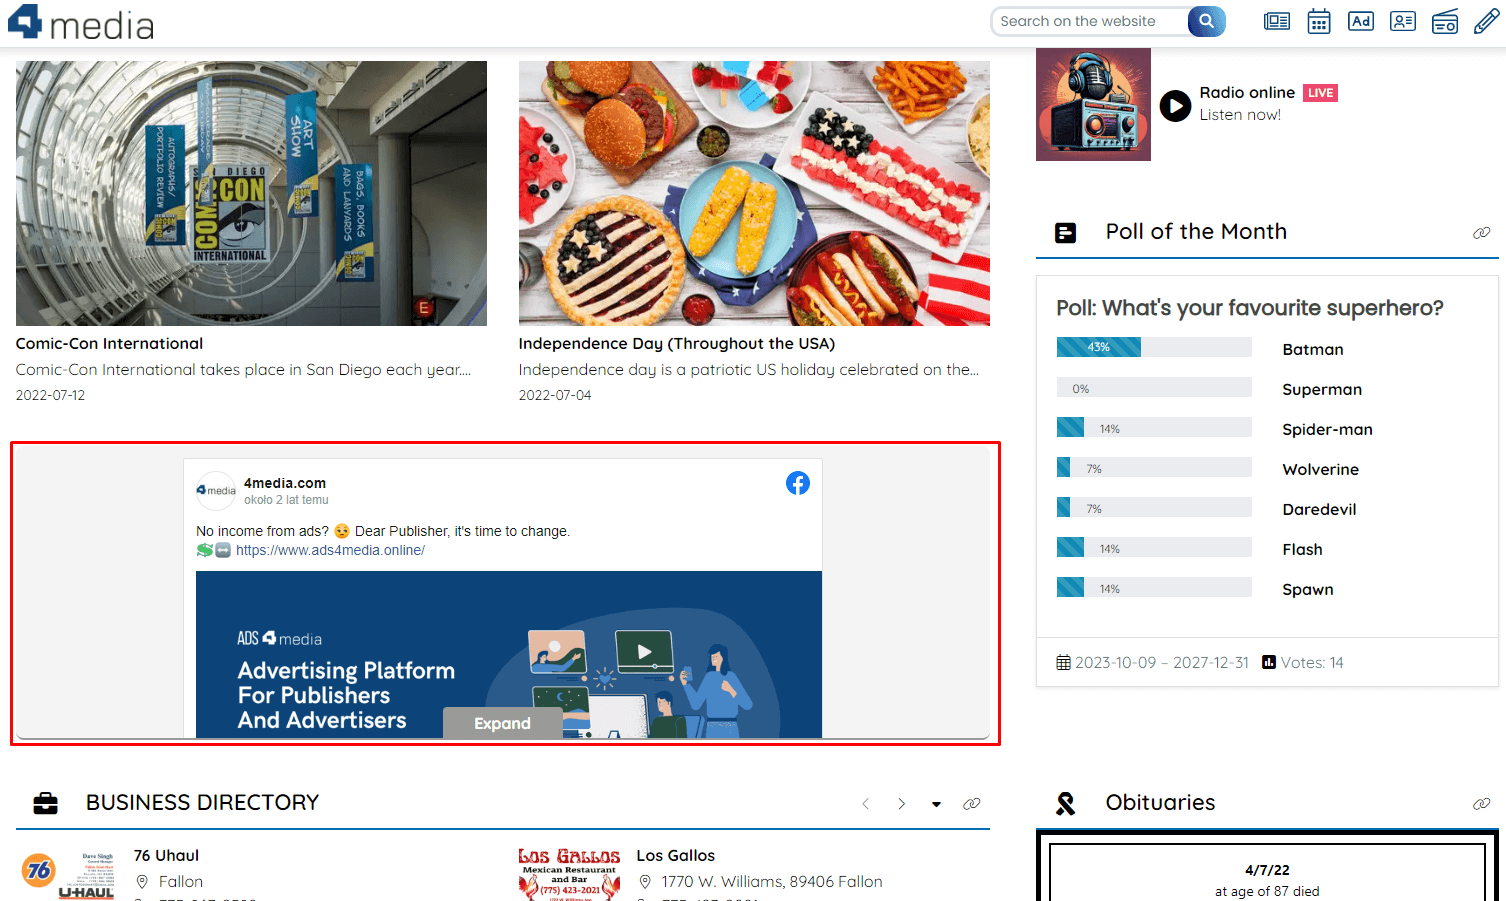
The Facebook Widget in CMS 4media displays (embeds) a post that has been published on the Facebook (Meta) social platform. The post is shown as a window with an "Expand" button, as seen in the screenshot below:
Upon clicking the "Expand" button, the widget expands downward, revealing the full content of the post – the entire image and text:
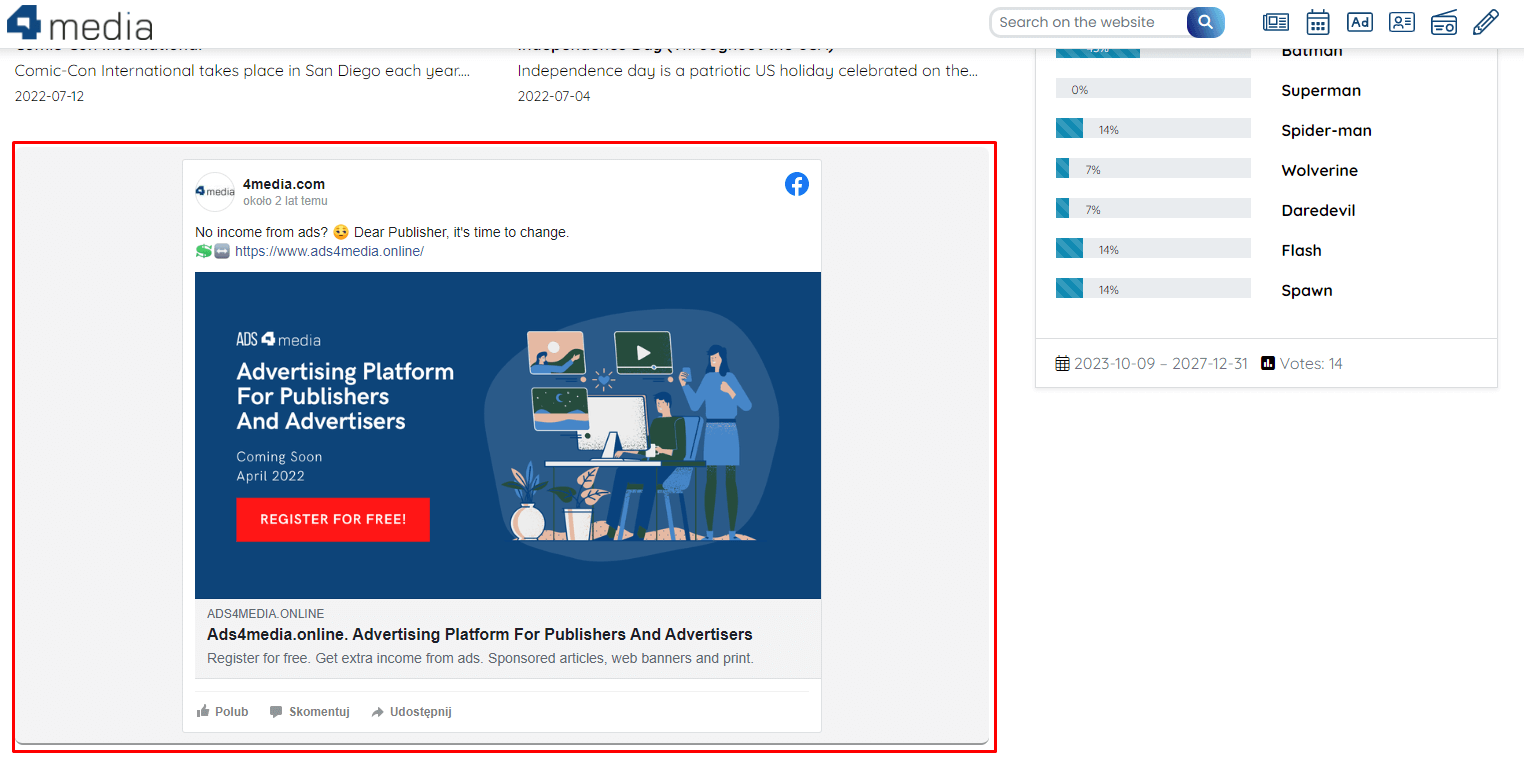
Clicking on the image or the content of the embedded post will redirect users to a new browser tab where the post will be displayed on Facebook.
Adding the Widget
You can use the Facebook Widget multiple times – in one page template, there can be several widgets with different content settings.
Widgets can be added in the Page Builder (Website Visualization) module. To do this, select the template you want to modify and edit it. More information on adding widgets and step-by-step instructions can be found in the guide: Adding Widgets.
Header Settings
Header settings are initially turned off when adding a new widget. You can activate them by clicking the "Show Header" switch. This will expand the header sections, which you can activate as desired.

- Header Text - you can enter your own short text here, such as "Now on Facebook," etc. The header text can act as a link if you activate the Header Link.
- Header Link - allows you to link the Header Text; simply paste the URL address, e.g., to your Facebook page, into the "Link" field.
- Header Icon - appears before the Header Text. If the Header Link is active, it is also linked.
Content Settings
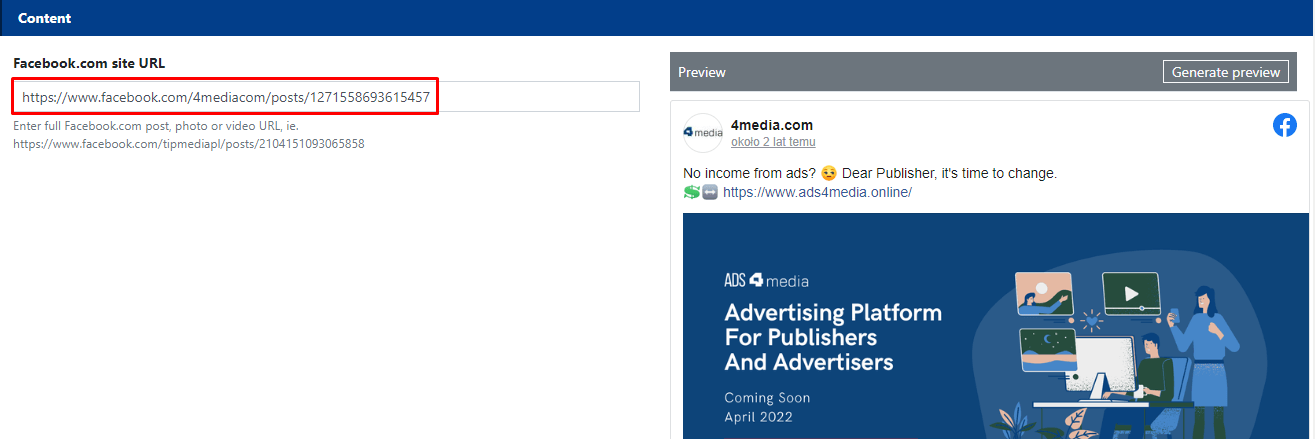
In the content settings, you need to paste the link to the post published on Facebook that you want to feature on your website.

The post link must include the post ID number, the so-called individual post identifier. Therefore, copying the post URL directly from the browser window and pasting it into the "Facebook.com site URL" field will not work.
How to Embed a Facebook Post in the Widget? How to Find the Post ID on Facebook?
The ID number is a numerical string at the end of the post URL, for example: https://www.facebook.com/tipmediapl/posts/860153572704711. Until recently, it could be found directly in the address copied from the browser. However, after recent changes on Meta (Facebook), the ID number is hidden. It can be accessed in a different way, as described below.
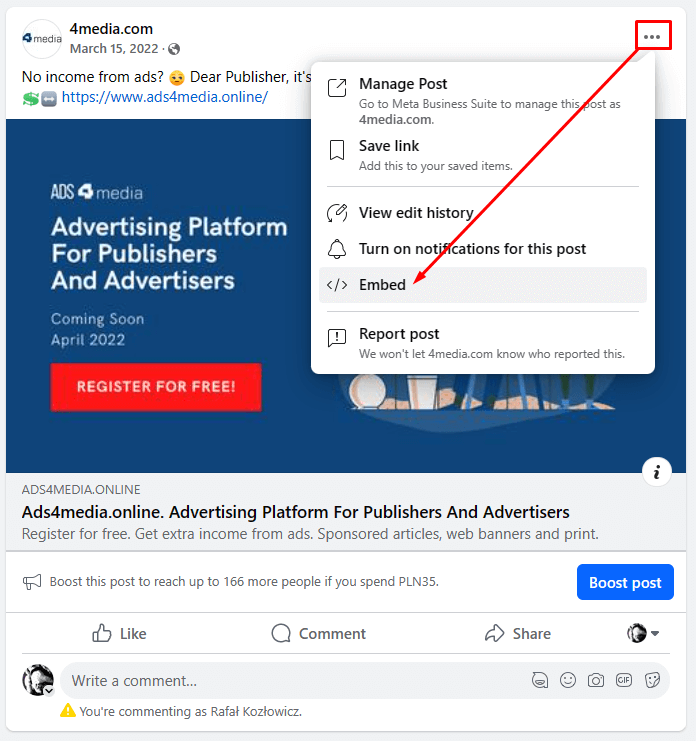
1) Click on the three-dot icon in the published Facebook post. A menu with advanced options will appear. Click on "Embed."
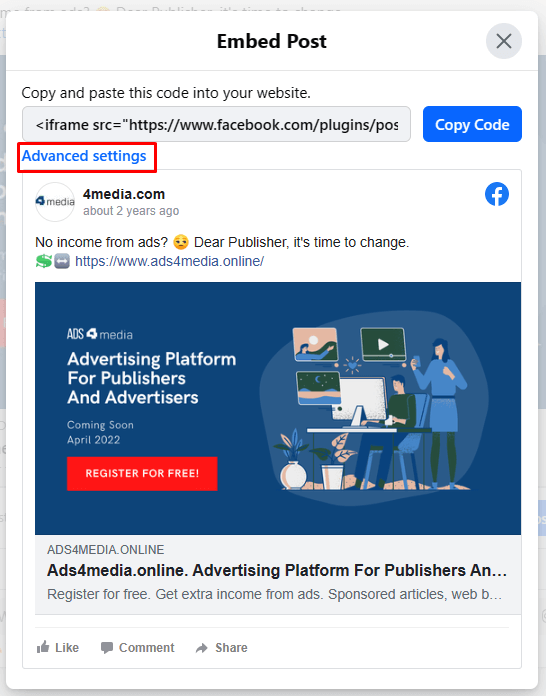
2) A window will appear where you can find and copy the <iframe> post code. However, we need to find the post ID. To do this, click on "Advanced Settings."
3) In a new browser tab, the Developer Tools view (Meta For Developers) for embedding posts will open. Click on the "Get code" button to preview the post ID number.

Important! To embed the post in the widget, you don't need to check or change the settings in the fields:
- Include full post
- The pixel width of the post
To embed the post within the widget, you only need to copy the URL with the post ID number.
If you need more control over the appearance of the embedded post, use the Custom HTML Code Widget.
You can uncheck "Include full post" if you don't want to include the post content (text) displayed below the image. You can also make changes in the "The pixel width of the post" field – you can experiment with this value if you want to publish the Facebook widget in the sidebar on the website and notice that the post width is greater than the widget. In that case, you need to go back to this step and enter a smaller post width, e.g., 350 px.
4) A window with various embedding options for the post on the website will appear.
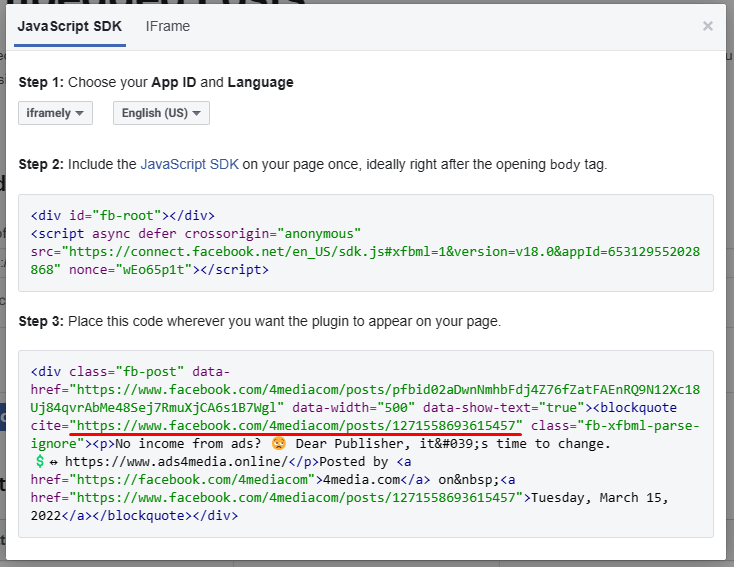
We are interested in the code displayed in step 3. This is where you need to find the post URL containing the ID number (highlighted in red in the screenshot above).
5) Copy it and paste it into the "Facebook.com site URL" field in the Widget Content section.
If you want to embed your Facebook page's business card in the widget, use the HTML Widget for this purpose. You can paste a customized <iframe> code in it to adjust the post display to the page layout. You can paste the ready code directly into the "Custom HTML Code" window.


