
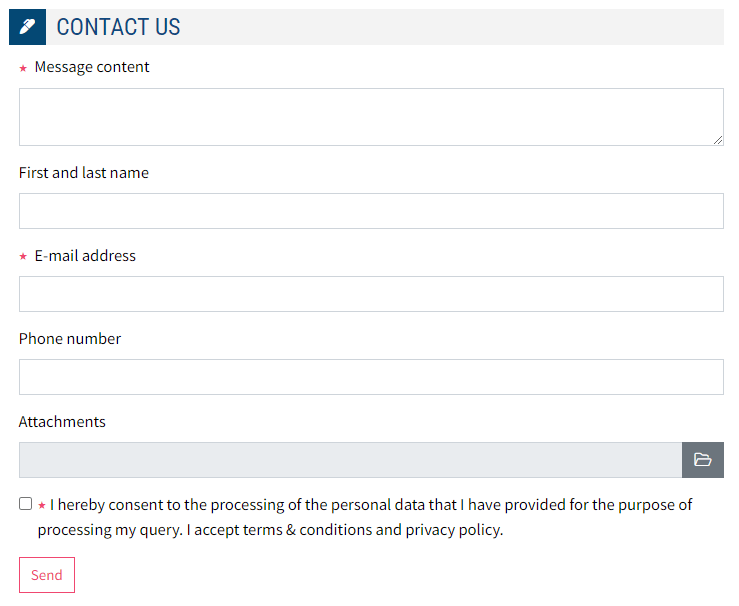
Users of your news website may witness important events. Make it easy for them to send messages, submit photos, and leave their contact information so you can call or respond to them.
So, be sure to add a contact form widget to the homepage of your news website!
Adding the widget
You can add the widget in the Page Builder module. Choose the template you want to edit from the template list (by clicking on its name or the "Edit" button).
The template content will open, and you'll see the widget layout where you can add the contact form. Do this by clicking the "+Add item" button. After clicking, the widget library will open, and you can choose the "Contact Us" widget. When you click on its name, the widget configuration window will open.
If you encounter difficulties adding the widget, consult our step-by-step guide (video available) on Adding Widgets.
Header settings
When the widget configuration window opens, the header section will be initially disabled. Activate it by clicking the "Show header" switch. The header settings will then appear, as shown in the screenshot below:
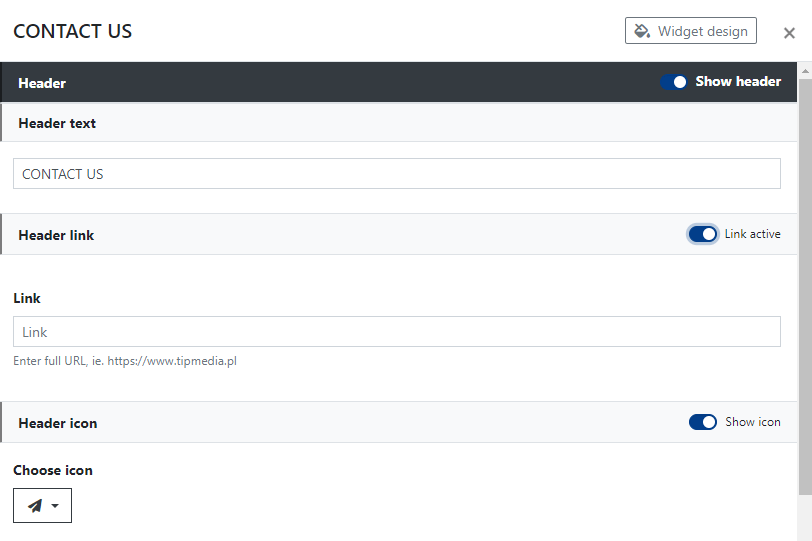
Here you can set:
- Header text - enter a short text displayed on the header bar (above the contact form fields). You can enter, for example, "Contact," "Contact Us," etc. The header text can be linked if you activate the "Header link" option by sliding the "Link active" switch.
- Header link - allows you to link the header text; you can paste a link to a Contact subpage, for instance. Clicking on the header text will then redirect the user to the specified URL.
- Header icon - enable icon display with the "Show icon" slider. The icon will be displayed before the header text. You can change it by selecting another one from the CMS 4media built-in icon library ("Choose icon" button). The icon can act as a link if the Header link is active.
Content settings
In the content settings, you can choose the form fields to display in the widget or enter the email address to which messages should be sent.
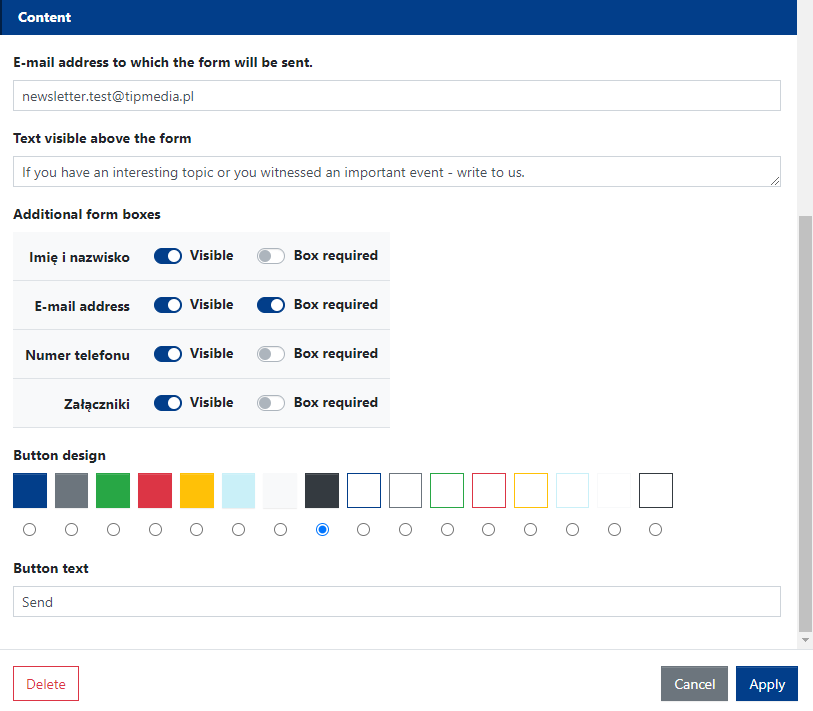
Here you can set:
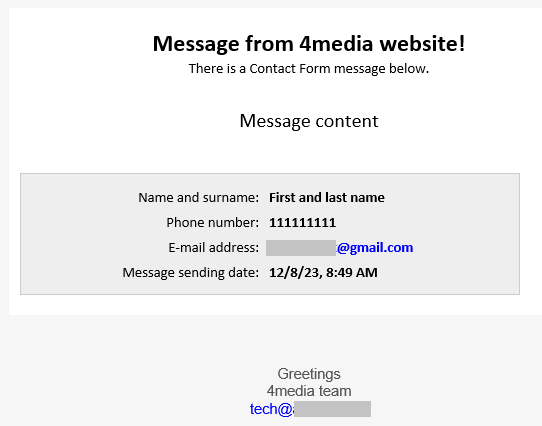
Email address to which the form will be sent - paste the email address to which you have access and where you want to receive messages from users who fill out and submit the form. The incoming messages may look like the screenshot below:
Text visible above the form - you can enter one or two sentences explaining why you want to receive messages from users or why it's worth contacting you. The content will be displayed below the header bar (if the header section display is marked as active).
Additional form boxes - here, you can mark with the slider those fields that should be displayed in the form. Additionally, you can mark those fields that are required for the user to fill out. If not completed, the form will not be submitted. The form fields to choose from include:
- Name and surname
- Email address
- Phone number
- Attachments
Button design - here, you have several color options for the "Send message" button appearance. You can choose a solid fill color or a colorful border.
Button text - here, you can change the text displayed on the button. The default text is "Send," but you can change it to, for example, "Submit form," etc.
How to set the sender email and name of the form messages?
To set the email address from which messages will be sent (Sender), go to Settings in the main CMS 4media menu. Then select Email Settings. You will see SMTP Mail Server Settings. All other email notifications to portal users, e.g., regarding announcements or business entries in the business directory, will be sent from this email address.
Set the host, port, login, email address, sender name, and password (if needed). You will find all this information from your email provider.

You can verify the entered settings with the "Test mail server connection" button. If everything is set up correctly, a message will appear at the top:

How to add consent to personal data processing to the form?
You can set the content of the checkbox for accepting data processing in the Clauses (Terms) module. If it hasn't been added there yet, click the plus icon in the circle ("Add new clause"). The new clause creation wizard will open.
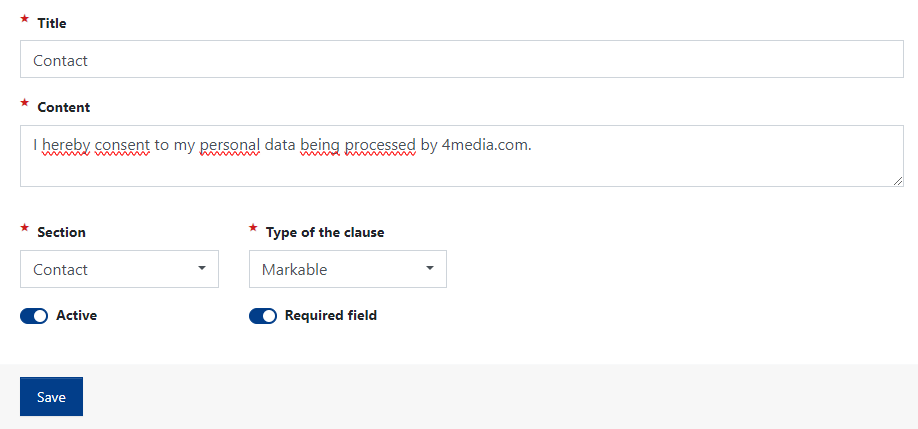
Fill in all fields marked with an asterisk.
The "Content" field will be displayed as a checkbox between the last contact form field and the "Send" button.
In the "Section" field, choose "Contact" to assign the clause to the contact form. As the "Type of the clause," choose "Markable" to have a checkbox appear alongside the consent text for personal data processing.
Remember to activate the sliders: Active and Required Field. The first one activates the display of the clause, the second one activates the display of the asterisk for consent and prevents form submission without checking the checkbox.


")
