
The Boards Widget allows to display graphic files in JPG or PNG format that have been previously published and marked as "Active" in the Boards module. This way, you can create an additional section on your news website with a slideshow.
Is a lot happening in your city? Are event organizers sending posters promoting their events to the editorial email? Placing them as thumbnails next to articles doesn't always look good (let's be honest - in most cases, it doesn't), and users rarely scroll through embedded images in articles.
So, if you want to reach a wider audience with information about upcoming events such as concerts, charity events, or any other form of visual communication, reach for the Boards Widget and add it, for example, to the homepage of your news website.

Adding the Widget
You can add the Boards Widget in the CMS 4media Page Builder module. Simply click on the template name (or the "Edit" button) to open its content and see the layout of the widgets within.
In the column where you want the widget to appear, click the "+ Add Item" button. A window with a widget library will open. Choose the Boards Widget and click on it. The widget configuration window will open.
After saving the changes, you can change the position of the widget by dragging and dropping it elsewhere.
Issues? Read the guide: Adding Widgets.
Header Settings
By default, header settings are disabled. Activate them by clicking the "Show Header" button. The header section's content will then expand.
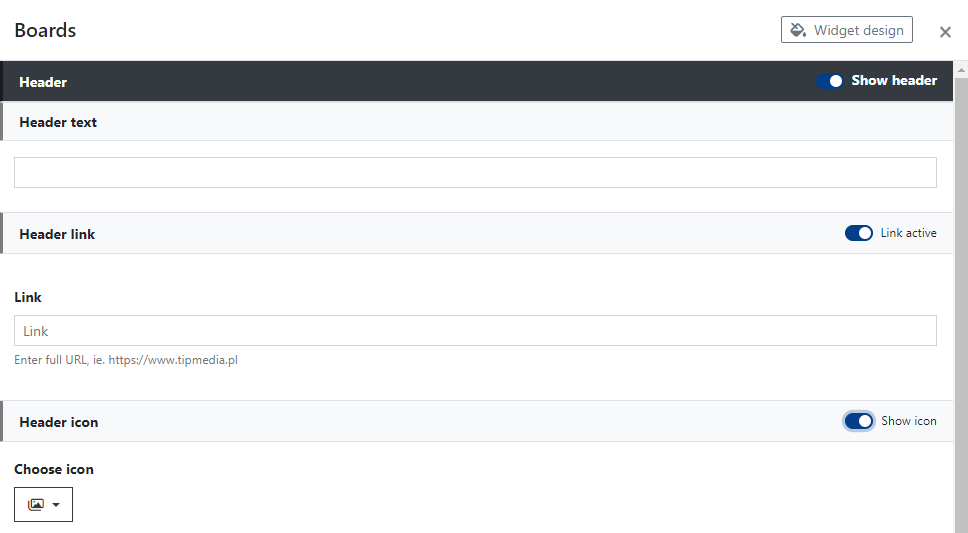
Here, you can set:
- Header Text - a short text entered here will be visible above the widget's content. It will be displayed on the header bar, the appearance of which you can decide in the advanced "Widget Design" settings. The header text can act as a link if you activate the Header Link.
- Header Link - if you activate the "Link active" switch, this subsection will expand, and you will be able to paste a link in the "Link" field. After saving the changes, the Header Text will act as a link.
- Header Icon - activate its display by clicking the "Show icon" switch. The icon will be displayed before the Header Text. It will also act as a link, similar to the Header Text, if you activate the Header Link. You can change the icon by selecting another one (drop-down list "Choose icon").
Content Settings
In the content settings, you can choose whether the widget should display all boards as a slideshow or show only one board. You can also set animation effects and scrolling speed (if you activate the "Overwrite board settings" switch).
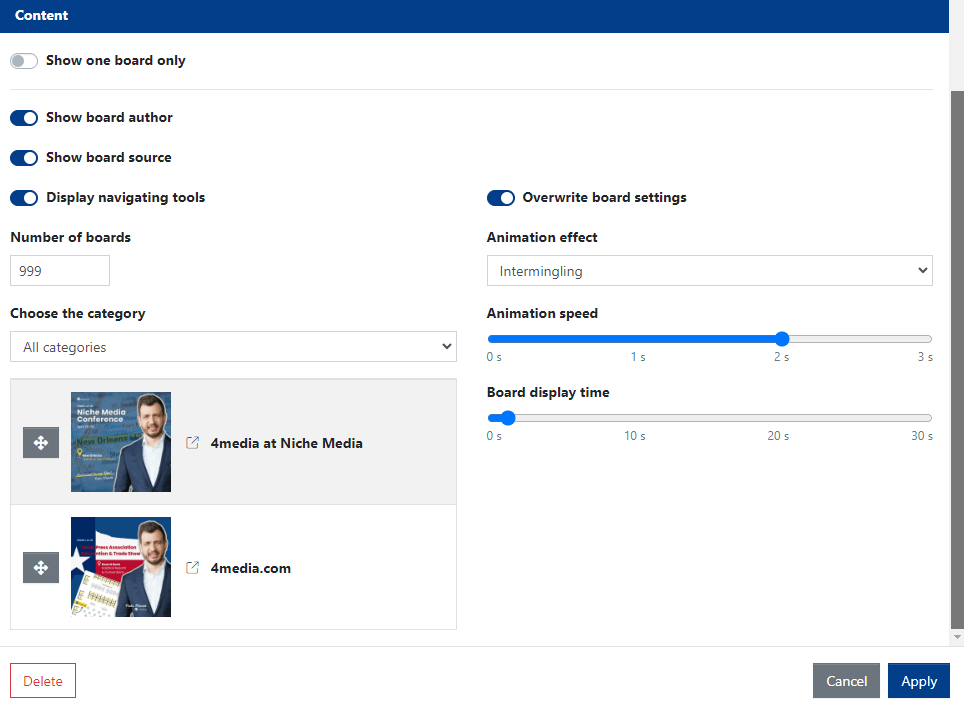
Show Board Author - if you check this option, information about the author (e.g., Author: John Doe) will be displayed at the bottom below the board. This information will be displayed if the "Photo Author" field was filled in when adding the board in the Boards module.
Show Board Source - if you check this option, additional information (as text) such as Source: 4media.com will be displayed at the bottom below the board. This will be visible if the "Photo source" field was filled in when adding the board in the Boards module.
Show Control Elements - if you check this switch, the widget will display control icons (arrows) that users can use to scroll through the widget's content (show the next/previous board).
Number of Boards - here you can enter the number specifying the maximum number of boards displayed in the widget.
Choose Category - here, from the drop-down list, you can choose the board category. The widget will display boards added in the selected category.
Overwrite Board Settings - allows overwriting global settings regarding the way boards are displayed in the widget (see paragraph: Slideshow settings in the widget).
Important! Only boards with the status "Active" will be visible in the widget. If you don't see a board available for display in the widget, check its settings in the Boards module.
Note! Boards can act as links if the "Link" field was filled in when adding the board in the Boards module.
Displaying a Single Board
By default, the widget's content is set to display multiple boards. If you want the widget to display only one, check the "Show one board only" switch.
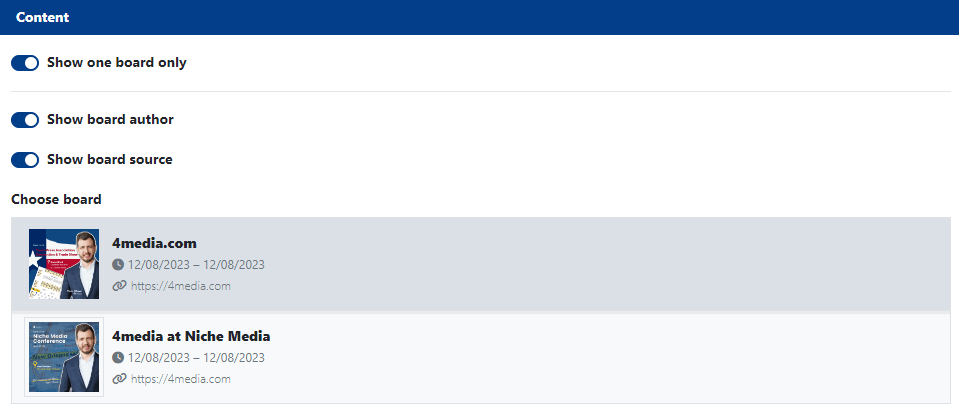
Then, the available boards that were previously added in the Boards module will be displayed. Click on the one you want to be displayed—it will be highlighted in a darker color, indicating that you have chosen it to be displayed in the widget. Then save the changes.
Slideshow Settings in the Widget
Global animation settings for boards are located in the Settings → Boards module. Here, you will see settings related to effects, animation speed, and delay for all boards and for each board category separately (you can create board categories in the Categories module).
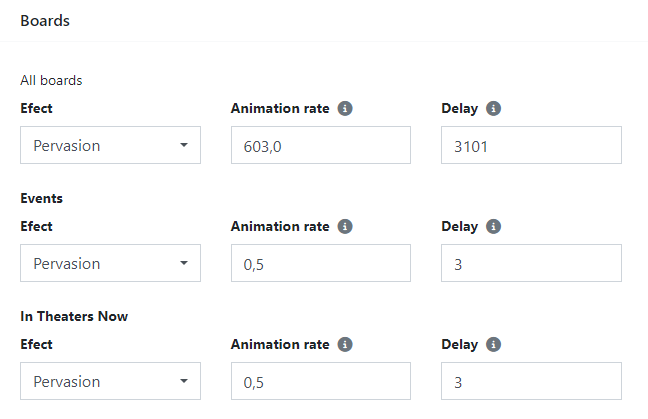
However, you can force different animation settings for the Boards Widget in the widget settings itself. You can do this by activating the "Overwrite board settings" switch.
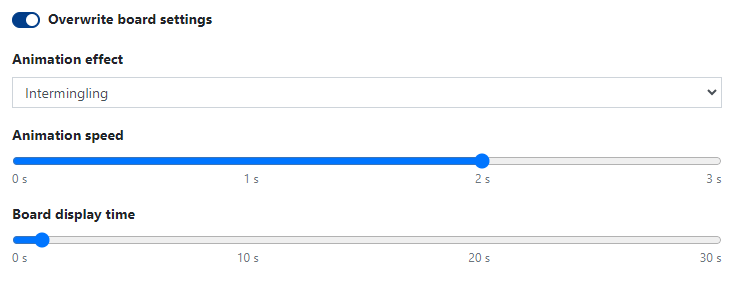
When you activate this switch, additional options will appear. You will be able to:
- choose animation effect (intermingling or scrolling),
- specify animation speed, i.e., the time between one board and the next,
- specify the display time of the board, i.e., the time the board will be displayed as a static image in the widget.
Remember that if you want to add new boards to the widget, they must first be added in the Boards module.


